Bowling for Beginners

  • Blog
  • Bowling 101
  • Basic Equipment
  • Oil Patterns
  • Scoring
menu icon
go to homepage
  • Blog
  • Bowling 101
  • Basic Equipment
  • Oil Patterns
  • Scoring
search icon
Homepage link
  • Blog
  • Bowling 101
  • Basic Equipment
  • Oil Patterns
  • Scoring
×

Home » Blog » Page 7

How Long Is a Bowling Alley Lane in Feet and Meters?

June 18, 2022 by Kira Byrd

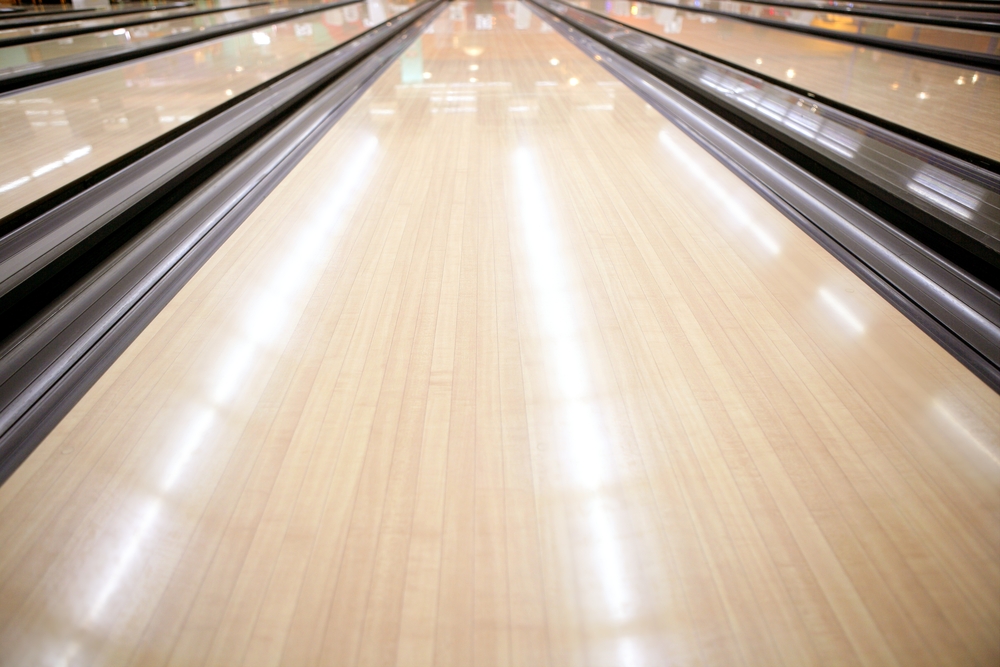
Bowling lane that meets united states bowling congress requirements - you can just see your bowling ball striking on this lane.

Bowling is governed by strict rules about play area dimensions, commonly referred to as the bowling lane. It’s a lengthy, linear rectangular alley composed of two gutters alongside to catch bowling balls.

The four basic components of a lane that have strict regulation are: the approach area, which includes a non-passable foul line, gutters or canals that run parallel to the lane's center, and the bowling pit is positioned at the end of the lane and houses the pin deck as well as any bowling pin gear. 

The regulations are in place to ensure that no one has an unfair advantage over their competitors, keeping the playing field leveled regardless of which alley you visit.

We've done the heavy lifting for you and discussed in detail how long is a bowling alley, the basic components, the actual dimensions, and what it means for your gameplay.

Contents

  • 1 How Long Is a Bowling Alley Lane?
  • 2 The Major Bowling Lane Components
    • 2.1 Bowling Alley Boards
    • 2.2 Bowling Approach Area
    • 2.3 What Are The Dots (Markings) on the Bowling Lane
    • 2.4 Arrows on Bowling Lane
    • 2.5 Pin Deck
  • 3 Are All Bowling Alleys the Same Length?
  • 4 How Long/Wide is a Mini Bowling Alley?
  • 5 Are Home Bowling Alleys Smaller Than Regulation Bowling Alleys?
    • 5.1 Space Required for A Home Bowling Alley
    • 5.2 Space Required for a Regulation Bowling Alley
    • 5.3 Other Bowling Alley Size Considerations 
    • 5.4 Does Bowling Alley Size Matter?
    • 5.5 How many boards are on a bowling lane?
    • 5.6 How much does a home bowling alley cost?
    • 5.7 How far apart is each pin?
    • 5.8 Are all bowling lanes the same length?
    • 5.9 Related Articles

How Long Is a Bowling Alley Lane?

A regulated bowling lane dimensions, including all the major parts, is sixty-two feet, ten, and three sixteenth inches (62 feet, 10 3/16 inches) (18.90 meters) long from the foul line to the very end of the pin deck.

When measured from the foul line to the head pin spot, it measures sixty feet (60 feet) (18.29 meters). The width, from gutter to gutter, is forty-one and a half inches (41.5 inches) (1.0541 meters) wide, give or take half a fourth of an inch (¼).

There are four distinct equipment parts that are included on any bowling lane that every player needs to know. In order of how they appear when a bowler is standing near the ball return, the parts are:

  • The Approach: This area makes up fifteen feet at the start of the bowling lane. The approach should use this area to add momentum to the throw and impart some force to get the ball to the pins.
  • The Foul Line: The foul line follows the approach and is a well-marked line. If the player oversteps this line, their throw is voided and they could sustain injuries.
  • The Lane: This is the actual play area where the bowl is released onto and where the pins sit. Part of the lane surface is oiled to increase its smoothness and it adds difficulty. 
  • The Pin Deck: The final part of the lane makes up the pin deck, where the ten pins are kept, collected, and rearranged for each throw. The center of pin one to the back of the pin deck must be thirty-four, three sixteenth inches. Give or take 1/16 of an inch.

All of these components can vary in width and length when the lane is not a regulation lane. 

The Major Bowling Lane Components

Bowling Alley Boards

The bowling alley lane is constructed out of boards made of wood and/or synthetic products. There are 39 boards with a width of roughly 1.06 inches (0.026924 meters) each.

The majority of the boards have the same appearance and are identical. Oil or conditioner is placed on the lane's boards for protection and by design or oil pattern.

Bowling Approach Area

The approach area must meet regulatory requirements and is a must in every bowling alley. This area must match the width or is wider than the lane.

It can't be smaller than the lane's width. In addition, the approach must be smooth and should be at least 15 feet (4.572 meters) long, measuring from the foul line backward.

What Are The Dots (Markings) on the Bowling Lane

On the approach, the dots or lane markings can be used only with the following specifications. The markings must be circular and placed along these measurements, starting at the foul line and moving backward. Each series of guides (line of dots) can only be placed in these locations:

  • 2-6 inches (0.1524 meters)- typically seven guided dots at the foul line
  • 3-4 feet (.944-1.2192 meters)
  • 6-7 feet (1.8288-2.1336 meters)
  • 9-10 feet (2.7432-3.048 meters)
  • 11-12 feet (3.3528-3.6576 meters)- usually the second set of dots on the approach
  • 14-15 feet (4.2672-4.572 meters)- typically at the start of the approach

Each guided series of dots should be parallel to the foul line, as in our example. The circular guides (dots) also correspond to lane boards 5, 10, 15, 20, 25, 30, and 35.

To give you an idea of placement, typically, the ball return can be found at the start of the approach area, along the bowler's walking route to the foul line.
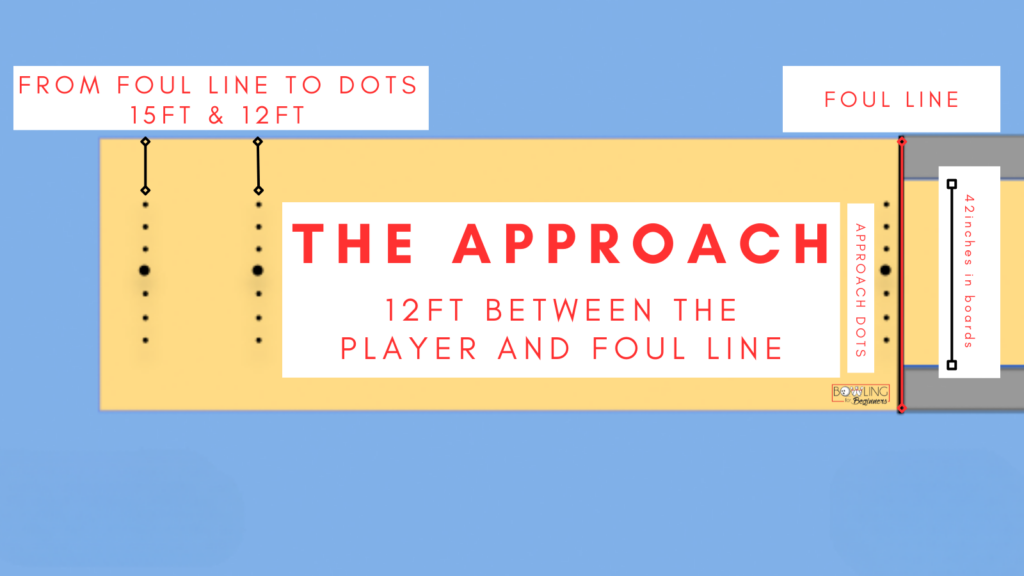
Typical approach at bowling alley lanes; approach dots are 12 feet and 15 feet from the foul line

Arrows on Bowling Lane

Section 1: The Front End of The Bowling Lane (The Skid Section)

Looking down the lane, beyond the foul line, after 12-16 feet (3.6576- 4.8768 meters), the bowling lane arrows must begin. Typically, it's seven guides or targets and can vary in shape. But the size must be is regulated to 1 ¼ inch (0.03175 meters) wide and six inches (0.1524 meters) long.

Boards 5, 10, 15, 20, 20, 30, and 35 are marked with arrows.

They're usually in the shape of a letter "v," with the middle arrow being the furthest away from the foul line. Typically, when the bowling ball is released because of the oil on the lanes, the ball is "skidding," sliding, breaking down, and/or absorbing oil through the oil because there is little friction.

Section 2: The Mid Lane (Hook Section)

Further down the lane, between 33-44 feet (10.0584-13.4112 meters), are the last four uniformed target guides. These targets can be as big as a single board and no bigger than 36 inches (0.9144 meters). As the bowler, this is where your bowl should encounter friction and start hooking back toward the pins' pocket.

Section 3: The Back End (Roll Section)

Since the ball has changed directions (started hooking), its target should be the pocket for a strike.
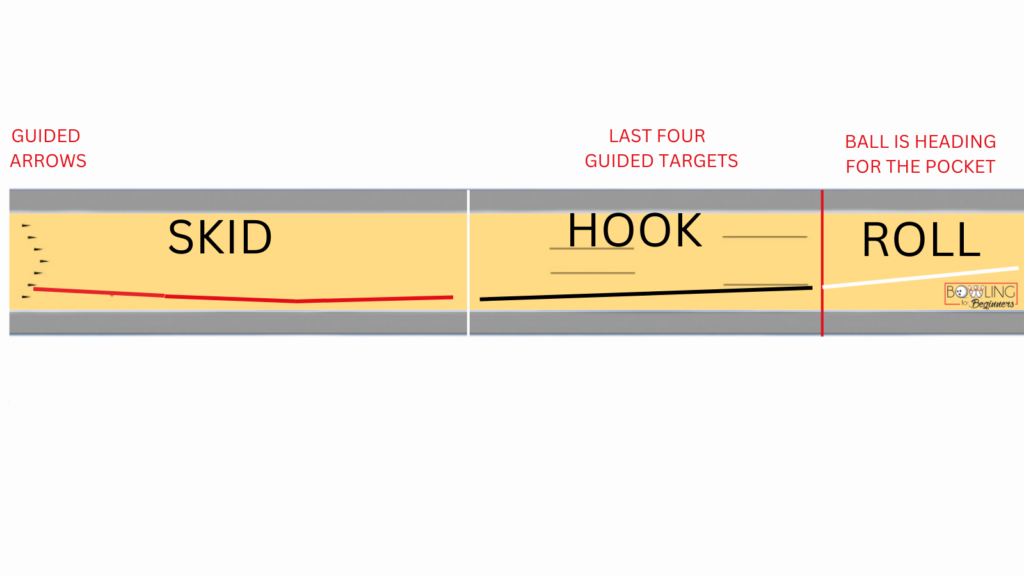
Image of the first set of guided arrows on the lane and shows the path of my roll for a strike

Pin Deck

From the headpin down the lane, the pin deck will normally extend 2 feet and 10 3/16 inches (0.8683625 meters). The pin deck is followed by a 3-inch tail plank. The bowling pins sit is a triangular formation on the pin deck. Each pin sits 12 inches (0.3048 meters) from its neighbor.

As the bowler, this is where you look for the pocket to strike. Pockets are located between pin 1 and pin 3 for right-handers, and pin 1 and pin 2 for left-handers.
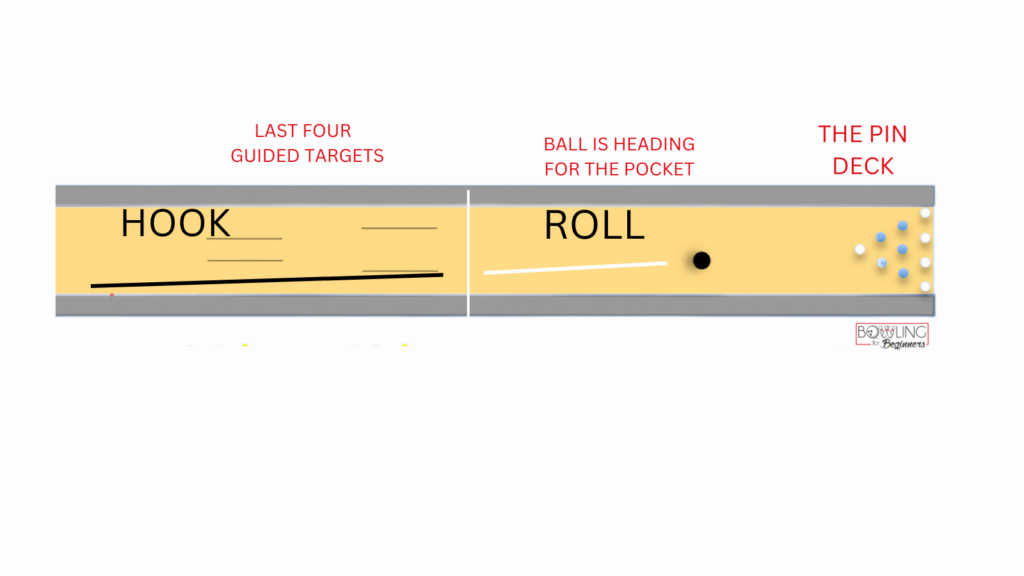
The pin deck's machines is bowling equipment

Are All Bowling Alleys the Same Length?

The bowling alley lane's length will vary, although the minimum length of 60’ applies for regulation alleys and duckpin bowling.

The length may vary based on the amount of space available for the bowling alley.

For that reason, you’ll find bowling alleys as long as 87’ or as short as 60’. 

How Long/Wide is a Mini Bowling Alley?

Don’t have enough space for a regulation-size bowling alley? Go for a mini-bowling alley instead. The average mini bowling system can easily fit into space around thirty-six feet (36') to forty-five feet (45’) long.

However, the length and width of mini bowling alleys also differ depending on the available space.

The shortest length of a mini-bowling alley you’ll find is around twenty-seven feet (27'), with the average length being thirty-six feet (36') to forty-five feet (45').

The width of these mini bowling alleys typically comes in at fourteen feet (14') for a pair of lanes. 

How to Build a Mini Bowling Lane! (Tutorial)

Are Home Bowling Alleys Smaller Than Regulation Bowling Alleys?

How long are home bowling lanes? Given the average lane length and lane width of a regulated bowling alley, home bowling alleys are far smaller and narrower.

The mini alley will feel small for those used to bowling on a regulation alley. You may even need to adjust your bowling technique to get the results you’d typically get at a commercial bowling alley. 

Space Required for A Home Bowling Alley

When determining how long is a bowling alley and the space requirement, a home bowling alley's dimensions will vary based on the buyer’s preferences and the size of the room it's in.

Anyone interested in purchasing a home bowling alley will need to consider the bowler’s area, the pinsetters, the lanes and their spacing, and the length of the lanes themselves.

Assuming the minimum size for everything, the smallest room you can house a home bowling alley in is approximately seven hundred square feet (700 sq. ft.

However, if you want a bit more room to play with and some slightly longer lanes, you may be looking at anywhere between eight hundred square feet (800 sq. ft) and nine hundred square feet (900 sq. ft).

Space Required for a Regulation Bowling Alley

You’ll need a space at least 100 feet long or wide for a regulation bowling alley. This room size will not only accommodate the lane, but the pinsetter, ball return system, and other odds and ends.

If your property doesn’t allow for such space, you’ll need to knock out some walls or opt for a smaller overall bowling alley. 

Other Bowling Alley Size Considerations 

To purchase a bowling alley for residential use, you need to look at more than the dimensions shared earlier.

Though knowing the average sizes is important, you’ll need to consider several other things to ensure that your bowling alley is a good fit for your household. Here they are:

How often do you plan on using it? 

Anyone who doesn’t plan on using their bowling alley often may want to opt for a smaller one. Why? If you only use your bowling alley occasionally, chances are you won’t want it to take up a ton of space.

On the other hand, if you’re a true bowling buff, you may want to go as big as you possibly can. In that case, go for a regulation-sized bowling alley.

How much bowling alley can you afford? 

A regulation-length home bowling alley (assuming you already own the land it's going on) will likely cost anywhere between $120,000 to $150,000 for a simple two-lane project.

The cost will vary depending on how many extras you want your home bowling alley to have and if you want to trick it out with more high-tech equipment or not. 

The obvious alternative is a mini-bowling alley, which is a lot more cost-effective. At the top end, a mini-bowling alley will probably cost around $50,000 to install, including two lanes and bowling balls and pins.

At the cheaper end of the scale, mini alleys can be constructed for as little as $18,000, although their performance and durability over the long term may be questionable.

Putting the time and effort into figuring out what you want from your home bowling alley will help narrow down your options.

What size bowling alley are you used to playing on? 

It may not be readily apparent, but the size of a bowling alley can affect your skill level and scoring ability. For instance, if you’re used to playing on a mini-bowling alley, you'll notice the difference when you switch to a regulated bowling alley. Your game may suffer to the point that you become frustrated.

The same goes for the reverse; switching from a regulation bowling alley to a mini-bowling alley may be underwhelming. In most cases, the experience of a regulated bowling alley is impossible to replicate with a mini-bowling alley. 

Does Bowling Alley Size Matter?

The size of your bowling alley does matter. A bowling alley that’s not the right size can result in more disappointment than fun.

Consider a case where you need a bowling alley for kids – a regulation-sized alley may not be the right choice.

The kids may find throwing the ball hard enough to hit the pins difficult.

Likewise, a mini-bowling alley may not be long enough for adults, leading to a bowling experience that’s less than a challenge. 

How many boards are on a bowling lane?
Bowling lane guide arrows for what you should hit for a strike

39- typically, there are 39, 1.06 inch (0.026924 meters) boards on a bowling lane.

Depending on the bowling center, this isn't always the fact. The fact is, a regulated bowling lane's width must be 41 ½ inches wide, give or take ½ an inch.

How much does a home bowling alley cost?
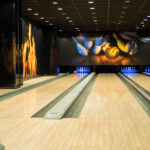
Bowling lanes when taken care of, last a very long time

Any from $80,000- $190,000, give or take.

The cost of having a bowling alley installed in your home will depend on a few things like, what size lane you want, and do you want multiple lanes, and of course, special features. We want to help you think through the process of getting a bowling alley in your home, so we researched for you to note a few things as you consider like, making sure there is proper ventilation and maintenance cost before adding a bowling alley to your home.

How far apart is each pin?
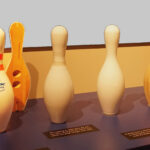
20190406 ten pin bowling pin manufacturing stages

12 inches. Bowling pins are set up at 12 inches away from its neighboring pin.

In a regulated pin formation, bowling pins are in a triangular formation and are 12 inches from each other. This distance is perfect to knock down pins and to create pin carry (think domino effect) on the pins closest to it.

Are all bowling lanes the same length?
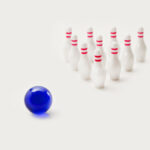
Mini bowling game with white pins and blue ball

Yes. All regulated bowling lanes are 60 feet long.

This measurement is from the foul line to the headpin. In addition, the width of regulated lanes is 41.5 inches, give or take half an inch. These measurements will have very little, if any, impact on your bowling performance and experience. They simply create consistency regardless of where you bowl. Of course, miniature bowling is different.

Related Articles

  • What Is a Good Average Bowling Score?
  • How Heavy Should My Bowling Ball Be?
  • Bowling With Small Balls

There you have it – while regulation bowling alleys have standard size rules, home bowling alleys are much more customizable.

If you want a bowling alley for your home, it’s crucial to take ample time to figure out just how large it should be.

Consider your home size, who will be bowling at your place, how much of a bowling fan you are, etc. Once you’ve chosen the perfect bowling alley size, you can proceed to the next step of the process – purchasing and installing it.

We hope that this article has been helpful to you, having given you in-depth information about bowling alley sizes and how to choose the right one for you.

Home » Blog » Page 7

What Is a Good Bowling Score for Beginners to Professionals?

June 16, 2022 by Kira Byrd

If you are wondering what a good bowling score is. Good average bowling scores depending on your skill level.

After bowling their first game, many new bowlers wonder how they did. The answer isn’t always very clear. There’s a lot to familiarize yourself with when it comes to bowling scores, and we’re here to help. This article will look at what makes a good bowling score and help you determine a good bowling average you should strive for. 

Contents

  • 1 What Is a Good Bowling Score?
    • 1.1 For Beginners/First-Time Bowlers
    • 1.2 For Casual Bowlers
    • 1.3 For Intermediate Bowlers (Non-league)
    • 1.4 For Professional Bowlers  
  • 2 How Scoring Works in Bowling
    • 2.1 What’s a Perfect Score in Bowling?
  • 3 The Bowling Average
    • 3.1 Bowling Averages to Strive For
    • 3.2 Beginner/First Time Bowler Average
    • 3.3 Casual Bowler Average
    • 3.4 Good Bowler (Non-league bowler) Average
    • 3.5 College Bowler Average
    • 3.6 Professional Bowler Average 
  • 4 Related Articles

What Is a Good Bowling Score?

A good bowling score varies depending on your experience level and whether you are a beginner, casual, intermediate, or professional bowler. It’s a lot of information to digest, so we’ll break things down below. 

For Beginners/First-Time Bowlers

For first-time bowlers, a score of 50 to 70 is considered good. While some will score lower on their first few games, it’s rare for anyone to bowl less than a 50 consistently.

Don’t worry about it if you don’t score well at first. Instead, focus on getting used to the feeling of playing and improving your rolls.

For Casual Bowlers

After their first few games, most bowlers fall into the casual or recreational category. Casual bowlers have had a little practice and time to develop their technique.

A good average bowling score for casual bowlers is 70 to 100 points, although some may score higher or lower depending on how often they’ve played. 

For Intermediate Bowlers (Non-league)

You'll need to consistently score between 130 and 170 to be considered a good intermediate bowler. Good bowlers are moderately skilled and are comfortable with their form and technique.

When you reach this level, you start to see a rise in strikes and spares, which helps contribute to an overall higher score. 

For Professional Bowlers  

A professional bowler is someone who makes a living by bowling. They’re dedicated, experienced, and considered the best in their field. Professional bowlers should look to score at least 200 to 250 points per game, although the higher the score, the better.

In addition to being more skilled, professional bowlers tend to score higher because they invest in specialized balls, shoes, and accessories. 

How Scoring Works in Bowling

A bad average score is no score at all. Scoring in bowling happens when a bowling ball is thrown at ten pins down a lane.

Bowling has a simple, straightforward point structure. There are ten frames during a game of bowling. For each frame, you’ll have two opportunities to knock down as many bowling pins as possible with a bowling ball.

The more pins you knock over, the higher your score. Every pin you knock down earns one point, but you can also earn bonus points by getting strikes and spares. 

For anyone unfamiliar with bowling terms, a spare is when you knock down all ten pins after throwing two bowling balls. After getting a spare, you’ll be awarded 10

points plus the total from your next shot.

On the other hand, a strike is when you knock all the pins down on your first try. If you get a strike, you’ll get 10 points plus the total from your next two shots. 

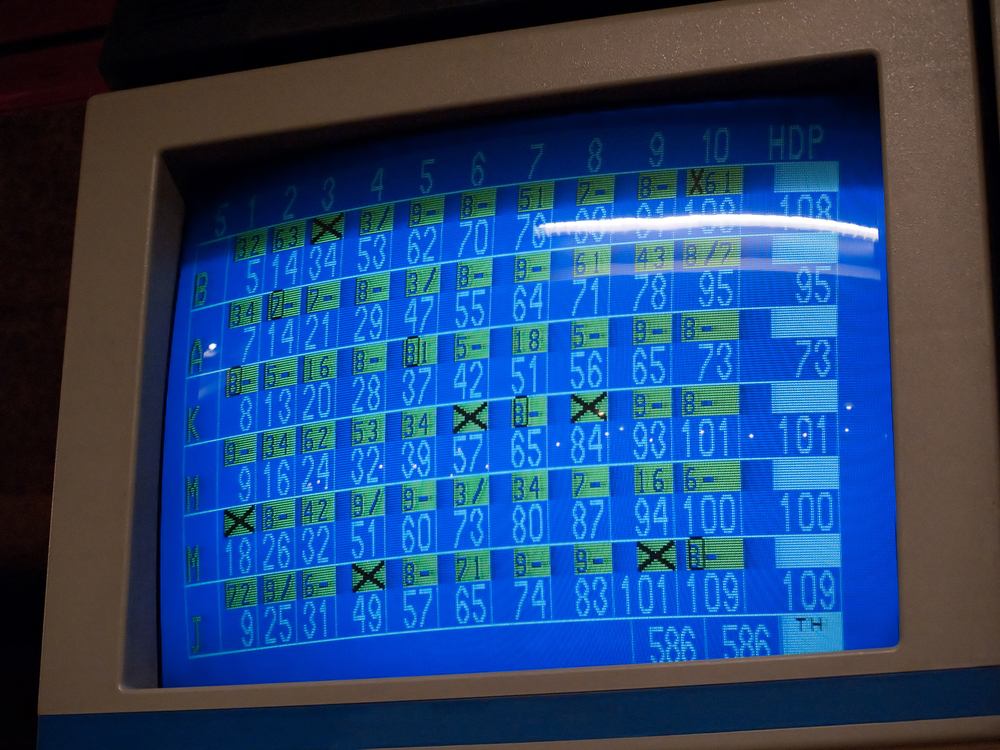
Your score will be recorded on a scorecard. Various symbols and numbers indicate how many pins you knocked down during each roll. 

  • An “X” denotes a strike.
  • A “/” shows that you got a spare. 
  • A “-” shows that you didn’t hit any pins during the frame. 
  • Other symbols include “F” for foul, “O” or “S” for a split.

What’s a Perfect Score in Bowling?

Although a game of bowling is comprised of only ten frames, getting a strike in the last round earns you two more shots for a total of 12 shots.

If you play a perfect game and get a strike in all twelve rounds, you'll reach the maximum score of 300 points. It's the highest possible score in a game.

If you were wondering, the highest score you can achieve in a game without getting any strikes is 190. 

Getting twelve strikes in a row is difficult. It takes both a high level of skill and luck. While twelve strikes is a perfect game, there are other terms for getting a series of strikes in a game.

The name depends on the number of consecutive strikes you get in a row. We’ll break them down below. 

  • One strike - Strike 
  • Two strikes in a row - Double
  • Three strikes in a row - Turkey or triple
  • Four strikes in a row - Hambone or four-bagger
  • Five strikes in a row - Yahtzee or five bagger
  • Six strikes in a row - Six pack or Wild Turkey 
  • Seven strikes in a row - Front seven or seven bagger
  • Eight strikes in a row - Front eight or eight bagger
  • Nine strikes in a row - Front nine or nine bagger
  • Ten strikes in a row - Front Ten or ten bagger
  • Eleven strikes in a row - Front eleven or eleven bagger
  • Twelve strikes in a row - A perfect game 

The Bowling Average

The Secret to Higher Bowling Scores! Simple But Very Effective!

You can calculate average scores by adding up the scores from all of your games and then dividing that number by the total number of games you played. Your bowling average helps determine your handicap, which is how league bowlers will match you against other players.

When you join a bowling league, your average will be calculated weekly. That means every game you play in a season counts towards your overall bowling average. 

Bowling Averages to Strive For

Now that you know what a bowling average is and how to calculate it, you’re probably wondering what makes a good one. This section will discuss the bowling average each skill level should aim for. 

Beginner/First Time Bowler Average

Don’t worry about your average too much when you first start bowling. The United States Bowling Congress won’t even recognize a player's bowling average until they’ve played a minimum of twelve games. Once you’ve got a few games under your belt, aim for a bowling average of at least 70 points. 

Casual Bowler Average

After you’ve started bowling more often, you should see your bowling average increase. As the fundamentals become second nature, try to strive for a bowling average between 100 and 130 points.

Just keep practicing, and your score should continue to improve with each game. You can also watch professional bowlers and try to pick up tips on form.

Good Bowler (Non-league bowler) Average

Once you’ve played many games, you should start to get the hang of things. By this point, your posture and technique have improved, and you might even start investing in some personal bowling equipment.

At this point, you should try to maintain an average of 140 to 175 points. Try to increase the number of strikes and spares you earn during each game, and your bowling average should continue to rise.

College Bowler Average

The competition on the collegiate level is fierce. It takes a tremendous amount of dedication, self-work, and teamwork to make the season a success. To stay on par with the competitiveness of our team and other schools, you should strive to maintain a college bowling average of 169 to 180 points.

Professional Bowler Average 

Professional bowlers have perfected their rolling technique and form and spend significant time practicing their craft. To stay competitive, professional bowlers should try to maintain a bowling average of 200 to 250 points.

Anything above 200 is considered excellent, so that should be your minimum goal. Once you consistently get 200+ points per game, you’ll have a much easier time earning sponsorships, endorsements, and business opportunities. 

Related Articles

  • How to Pick up Spares in Bowling?
  • Professional Bowler Average

We hope this article answered all your questions and helped explain what makes a good bowling score. To sum things up, there is no universal score that’s good for everyone. It depends on your experience level, and the more you play, the better you’ll score.

If you only bowl casually, the most important thing to do is have fun. If scoring high is important to you, practice as much as possible. You’ll be bowling like a pro in no time! We wish you the best of luck! 

Home » Blog » Page 7

How to Clean Bowling Shoes? Can You Use a Washing Machine?

March 16, 2022 by Kira Byrd

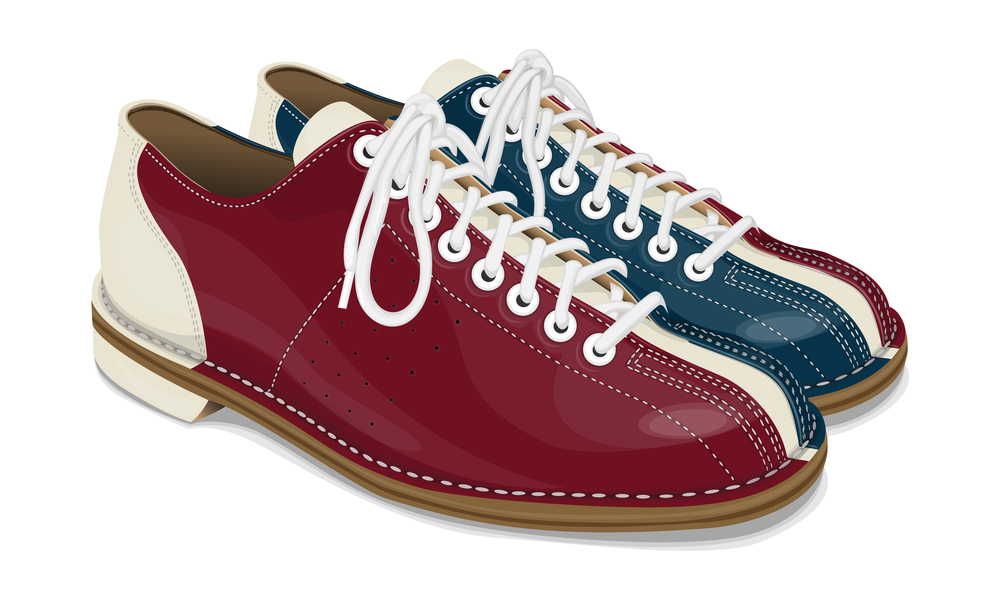
Tri-colored red, white, and blue bowling shoes that were recently cleaned with a steel wire brush to remove dirt.

Bowling shoes are a must when you’re at the bowling alley. They prevent injury and can even help enhance your performance! But what happens when they get dirty?

Your first instinct might be to clean them like you would your casual shoes, but it’ll take a little bit more than that. Similarly to cleaning your bowling ball, there is a process.

If you want to know how to clean your bowling shoes like a pro, read this article.

We’ll give you step-by-step directions on how to clean bowling shoes properly.

Contents

    • 0.1 Key Takeaways
  • 1 Get Your Supplies Ready
  • 2 Clean Your Laces
  • 3 Scrub Your Insoles
  • 4 Wipe Down the Exterior  
  • 5 Clean the Bottom of Your Shoes
  • 6 Let Your Shoes Dry
  • 7 Can You Wash Bowling Shoes in A Washing Machine?
  • 8 How To Clean Bowling Shoes In A Washing Machine
  • 9 The Dos and Don'ts of Cleaning Bowling Shoes 
  • 10 Dos
  • 11 Don’ts
    • 11.1 Related Articles
    • 11.2 My Final Words

Key Takeaways

  • Gather Cleaning Supplies: Essential items include a wire brush, towel, disinfectant spray (optional), dish soap or shoe cleaner, a bowl, toothbrush, paper towels, and a bucket with water. These tools ensure a thorough clean without damaging the shoes.
  • Clean Laces Separately: Remove laces from shoes and soak them in a warm water solution with 1-2 teaspoons of cleaner. This step effectively removes dirt and debris from hard-to-reach areas.
  • Scrub Insoles and Interior: Use a toothbrush with a cleaning solution to scrub the insoles and interior surfaces. If possible, remove the insoles for a deep clean, ensuring all sweat and dirt are scrubbed away.
  • Exterior and Sole Maintenance: Gently scrub the shoe's exterior with a soapy water-dampened towel. Use a wire brush on the soles in one direction to maintain traction without damaging them.
  • Dry Shoes Properly: After cleaning, let shoes and laces air dry in a cool, dry place away from direct sunlight to prevent damage. Avoid storing damp shoes to prevent odor and microbial growth.

Get Your Supplies Ready

The first step to cleaning your bowling shoes is having all the supplies handy. Here’s what to grab:

  • Wire brush
  • Towel
  • Disinfectant spray (optional)
  • Dish soap or shoe cleaner
  • Bowl 
  • Toothbrush
  • Paper towels
  • Bucket 
  • Water  
Cleaning StepSupplies NeededKey Notes
Laces Cleaning- Bowl
- Warm water
- Cleaner
Soak laces, rub to remove dirt.
Insoles and Interior- Toothbrush
- Cleaning solution
Remove insoles if possible, scrub and wipe interior surfaces.
Exterior Cleaning- Towel
- Soapy water
Use small circular motions, avoid over-saturation.
Sole Maintenance- Dry paper towel
- Wire brush
- Toothbrush
Clean off debris, use wire brush in one direction.
Drying Shoes- Clean, dry towel
- Cool, dry area
Avoid direct sunlight, allow complete drying.

Clean Your Laces

A red and blue bowling shoe on a blurred background of a bowling alley, will be cleaned with a soft cloth to avoid leather flaking.

Get a bowl of warm water, add one to two teaspoons of cleaner, and mix well. Then, remove your laces from each bowling shoe and drop the laces into the bowl.

Let your shoelaces soak until you finish washing your shoes. Every few minutes or so, rub the wet shoelaces together to help remove stuck-on dirt and debris. 

Scrub Your Insoles

Shoe insoles that are visibly worn and should be removed from the shoe, and with water and dish soap, wiped with micro fiber towel to remove any possible green mold.

Dip your toothbrush into the cleaning solution and gently scrub the inside of your shoes. If you can, remove your insole to give it a deep clean. Keep scrubbing until you’re sure you’ve removed all of the sweat and dirt.

Then, wipe the interior surface with a soft, damp cloth to remove soap residue. Pat the insole and interior surface dry with a dry paper towel to get a head start on drying. 

Wipe Down the Exterior  

Tri-colored red, white and blue bowling shoe that was wiped with a dry cloth and microfiber cloth to remove surface dust.

Once the inside of your shoes is clean, it’s time to work on the exterior. Dip one corner of your towel into the soapy water and scrub the outside of your bowling shoes.

Use small circular motions and keep rubbing until you’ve removed all of the visible dirt and staining.

Avoid over-saturating your shoe with water, or you may damage the exterior. After it's clean, pour some fresh water onto a paper towel and wipe away the visible soap residue.

You might have to do a few passes to clean your shoe. Finish off the exterior by wiping it down with the dry side of your towel. 

Clean the Bottom of Your Shoes

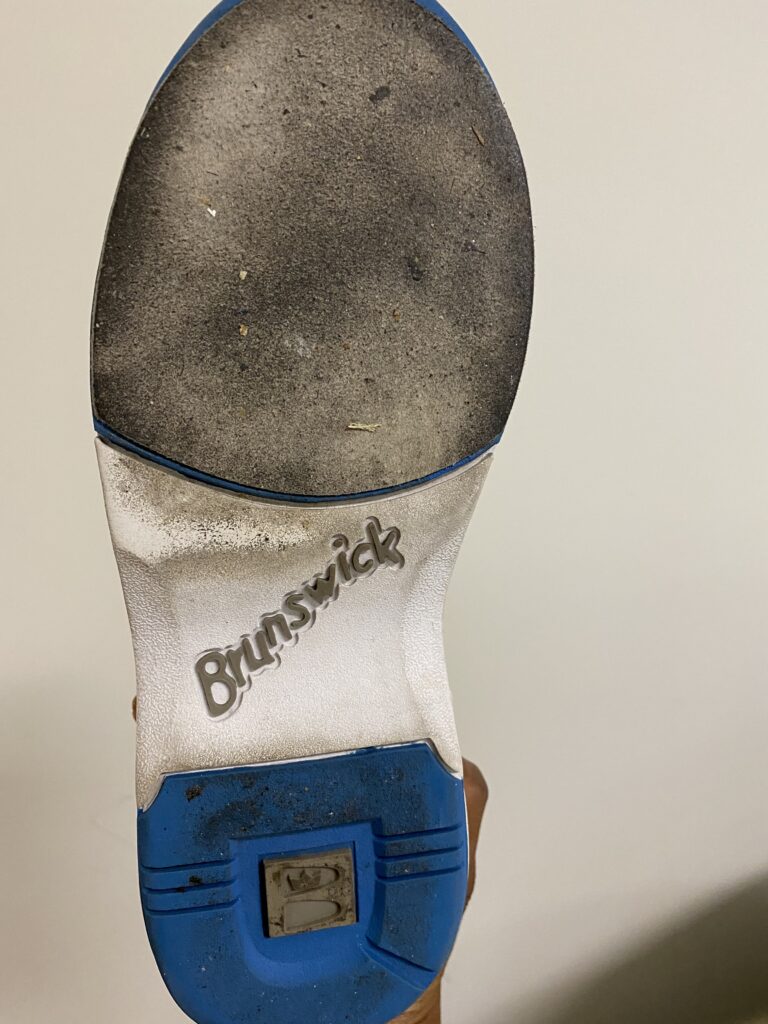
The bottom of the shoes shows dirty slide strips to be cleaned with a wire bristled brush, with just enough pressure not to damage the slide pad. Wearing shoe covers help to minimize the dirt on the slide soles.

As the main point of contact between your feet and the ground, your soles are the dirtiest part of your bowling shoes. Use a dry paper towel to remove hard debris and dirt.

This step can be messy, so you might want to head outside, so you don’t make a mess. Then, use your wire bowling shoe brush to scrape against the rubber soles of your shoe.

Make sure you only scrape your brush in one direction and never drag it back and forth. Dragging the brush in one direction creates little grooves on the underside of your shoe and creates the perfect amount of grip.

Keep an eye on how much pressure you’re using to scrape the bowling shoes slide strip on the bottom of your shoe. While you want to remove stubborn buildup, you don’t want to gouge the soles accidentally.

So, use firm yet gentle pressure to get everything clean without destroying the soles.

After removing all the debris, take your toothbrush and dip it back into the soapy water. Scrub the bottom of your bowling shoes until they are spotless. Wipe them off with a damp paper towel to remove excess soap, then pat dry with your towel. 

Let Your Shoes Dry

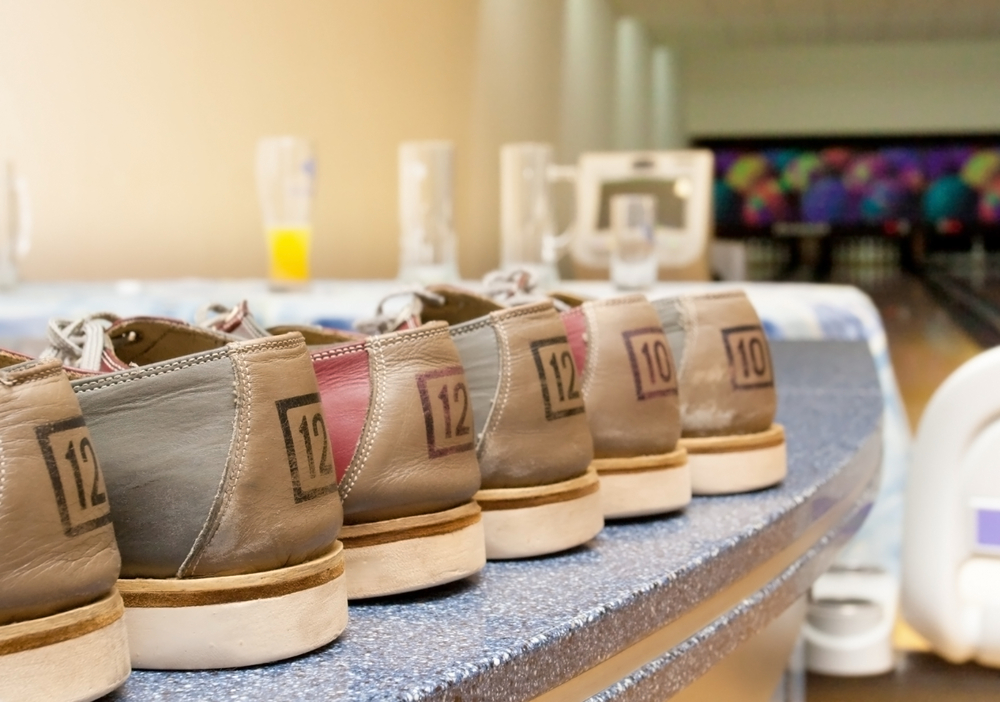
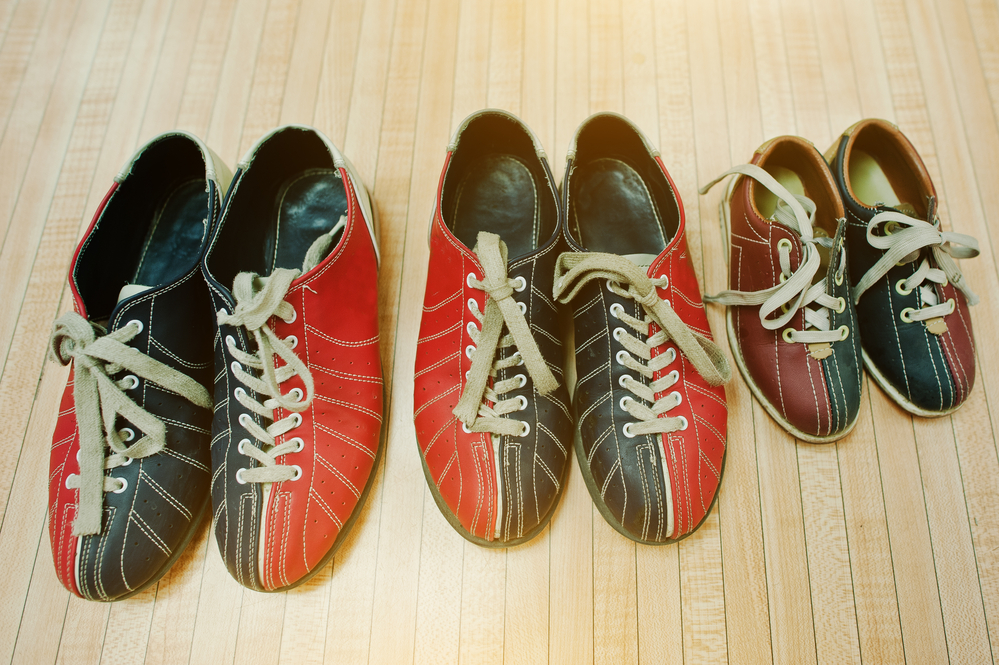
Multiple pairs of shoes in a line on a countertop at the local bowling shop. The shoes were disinfected and are sitting in a dry and cool place.

Remove your shoelaces from the soapy water and rub them together one last time. Then, rinse with fresh water and wring them dry. Place your shoes and laces on a clean, dry towel.

Keep your shoes away from direct sunlight, as the UV rays can cause the leather to crack and fade. Instead, pick a cool, dry area with plenty of airflow. 

Wait for your shoes to dry completely; never store damp shoes in your bowling bag. 

If you must, leave your bowling bag open slightly so the moisture can evaporate. You can also give the inside of your shoes a quick spray with disinfectant, but this step is entirely up to you.

A disinfectant spray will kill viruses and bacteria left behind after washing. Some disinfectants even prevent microbial growth for up to 72 hours after application.

Can You Wash Bowling Shoes in A Washing Machine?

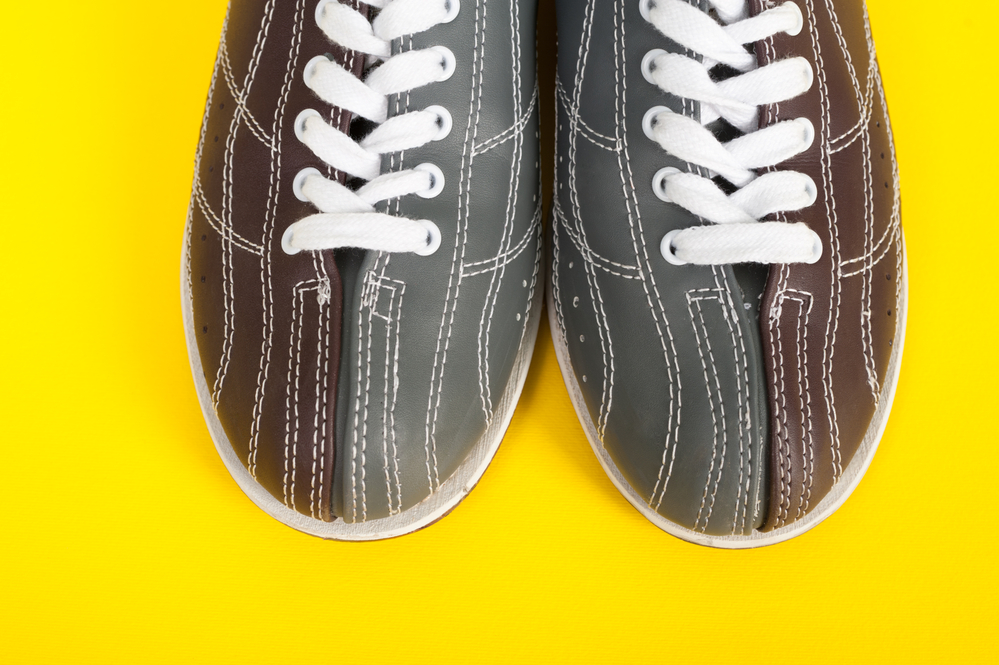
Two colored shoes, gray and burgundy, on a yellow background. These clean shoes were cleaned in the laundry machine with mild detergent.

Although it's not recommended, you can wash your bowling shoes in a washing machine. Washing machines clean your bowling shoes much more thoroughly and effectively than handwashing.

It also takes significantly less time and effort on your part. However, washing machines are rough on shoes, causing them to lose shape or wear out quickly. 

How To Clean Bowling Shoes In A Washing Machine

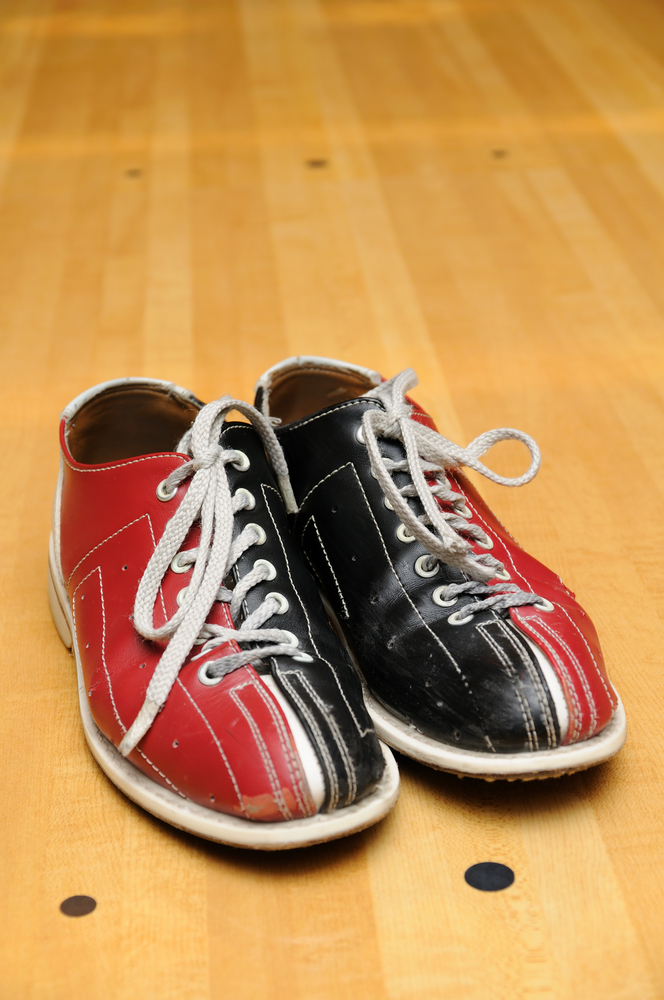
Three pairs of dual-colored, red and blue bowling showing against a pinewood bowling lane are fashion trends among professional bowlers.

Handwashing will help your shoes last longer and look their best, but washing machines are fine if you’re in a pinch or need a deeper clean. Start by removing the laces and insoles and placing your bowling shoes in a protective laundry bag.

If you don’t have one, you can use a pillowcase instead. Make sure you use a pillowcase you don’t mind getting stained, as some of the dye can rub off the shoes. 

The bag keeps your shoes secure in the washing machine, which minimizes damage to your shoes and the machine. Once your shoes are secured, add a small amount of liquid detergent and put your machine on a slow, delicate cycle.

Use cool or cold water, as warm temperatures can damage leather and cause your shoes to warp. Once the wash cycle is complete, put your shoes in a cool area to dry. 

The Dos and Don'ts of Cleaning Bowling Shoes 

These are dual-colored, red, and blue bowling shoes on a bowling lane. The soles were cleaned and one direction brushing techniques were used to activate the sliding mechanism on the soles to get more traction.

Now that you know how to clean your bowling shoes, we’d like to dive into the nitty-gritty. Here is a list of best practices to ensure that your shoes are squeaky clean without damage.  

Dos

Ensure you keep the following tips in mind whenever you clean your bowling shoes. 

  • Do remove the laces before you clean your bowling shoes.
  • Do scrub your shoes gently so you don’t scratch up the leather. 
  • Do disinfect your shoes in between washings. 
  • Do replace your soles when they start to wear out. 
  • Do wash your shoes after every few wears.
  • Do use specialized cleaning methods and products depending on the material your bowling shoes are made from.

Don’ts

Here’s a list of things you should avoid while cleaning your bowling shoes. 

  • Don’t walk outside in your bowling shoes. Limit the amount of dirt your shoes come in contact with.  Use these instead.
  • Don’t clean your shoes with harsh detergents. They could shorten the life of your shoes. 
  • Don’t throw your bowling shoes into the washing machine if you can avoid it. Though a washing machine can clean your bowling shoes well, it can be damaging. 
  • Don’t scrape your wire brush back and forth, or you’ll mess up the traction at the bottom of the shoes. 
  • Don’t dry leather shoes with a blow dryer, the sun, or a heater. 
  • Don’t wear bowling shoes until they are completely dry. 
  • Don’t submerge your bowling shoes in water. 

So, there you have it! Washing your bowling shoes is an easy, albeit time-consuming, process. The goal is to keep your bowling shoes clean and well maintained.

Related Articles

  • How to Clean Bowling Shoes Slide Strip
  • Can a Bowling Ball Lose Its Hook? Why Does This Happen?
  • What Is No Tap Bowling? Why Is It Called No Tap Bowling?

My Final Words

Properly maintaining your bowling equipment collection is crucial for ensuring the best performance and less injury risk on the lanes. By following a disciplined cleaning technique, which includes using a small bucket for water distribution and a scrubbing motion to clean dirt off the soles and exterior, you protect the essential sliding action necessary for an accurate stoppage at the foul line. Keeping the soles clean prevents unwanted traction with the outside ground, significantly reducing injury risk.

Moreover, regularly cleaning your shoes with a fresh cleaning solution not only keeps your bowling shoes in top condition but also covers acts of care that prolong the life of your gear. Remember, a well-maintained pair of bowling shoes is critical to consistent performance and safety.

Home » Blog » Page 7

How to Hold a Bowling Ball (and Finally Increase Your Average Score)

April 20, 2019 by Kira Byrd

How to hold a bowling ball using middle and ring fingers.

Chances are that when it comes to gripping a bowling ball, you are self-taught. Most of us go through the process, usually using a house ball from a bowling alley, as we learn how to pick up and grip the ball.

We learn how to maneuver our bodies, limbs, and fingers just right to propel the ball down the lane to the awaiting pins. We may even pick up the basics of aim and approach on our own, refining the process through trial and error.

Now, have you ever taken the time to pause and consider how you grip your bowling ball and how switching your bowling grip could possibly change up your game?

Contents

  • 1 How to Hold a Bowling Ball
  • 2 Why is Your Grip So Important?
  • 3 How Do You Know Your Ball Is the Right Fit?
  • 4 How Many Holes Go in a Bowling Ball?
    • 4.1 2 Holes
    • 4.2 3 Holes
    • 4.3 4 Holes
    • 4.4 5 Holes
    • 4.5 No Holes
  • 5 Why Are There So Many Different Types of Hole Drills?
    • 5.1 Different Grips
    • 5.2 Conventional Bowling Grip
    • 5.3 Fingertip Grip
    • 5.4 Semi-Fingertip Grip
    • 5.5 Sarge Easter Grip
    • 5.6 Related Articles

How to Hold a Bowling Ball

In order to grip and hold your ball, you first need to figure out how you hold on. There are several different ways that bowlers do this, varying to different drillings and different techniques.

If you are self-taught, chances are you learned how to bowl using a ball with three holes drilled into it, the two upper for your middle and ring finger and the lower for your thumb.

While this is the most common style of bowling ball hole drills, there are types out there with two, four, five, or even no finger holes! Keep reading to learn how to hold a bowling ball in various grips.

Why is Your Grip So Important?

How you grip your ball is extremely important in bowling. Your grip affects how well you control your ball speed, regulates the release of your ball, helps you maintain a consistent rev-rate, and helps control the direction of your ball.

Your grip also helps you aim your ball and keep your throws predictable and consistent throws. Having a stable, relaxed grip plays a key role in so many different parts of your throw that having a working grip for you is essential to boost your scores.

How Do You Know Your Ball Is the Right Fit?

Your grip should always be comfortable, with enough space in the holes to allow your bowling fingers easy entry and exit, both during stationary holding and release.

If the holes of your bowling ball are too tight, it could create blisters, and calluses, rip off fingernails, and throw off your ball’s release entirely.

The best way to know that you have a correct fit is to get your ball drilled at a pro-bowling shop.

You could have an excellent bowling ball that gets ruined by an ill-fitted grip, resulting in poor performance and low scores. Going to a professional shop and having experts measure your hand layout and drill lessens the chances of your ball getting messed up.

How Many Holes Go in a Bowling Ball?

With a good part of your bowling being so reliant on your grip, how you grip your ball can change your game.

Different hole drill layouts can change how you throw your ball and, therefore, the grip you use.

Bowling balls showing 3 finger holes and finger grips.

2 Holes

For a two-finger grip, the bowler will insert their middle finger and ring finger into the ball, and the thumb stays out. Most bowlers use the two-finger hold for big hooks, gaining the most control over the spin of the ball.

3 Holes

The most common drilling for finger grip holes. Generally placed in an upside-down, triangular formation, the top two holes are for your middle and ring fingers, with your pointer and pinky fingers resting to the side on the surface of the bowling ball.

The single lower hole is your thumb hole, creating a grip that allows you to hold the bowling ball properly and grip your ball with only three fingers.

This grip allows for the bowler to control the movement and the release of the ball well, with all the fingers working together to shift and turn the ball.

4 Holes

Many people change up to a 4 hole grip for one of two reasons. Alleviating pressure on the fingers used in a 3 hole grip (especially if the bowler suffers from arthritis) or working to create a stronger grip for more control.

While it is usually the pinky that is placed into the ball in a 4 hole grip, some bowlers have been known to use their index finger, often with mixed results.

5 Holes

When you use a 5 hole grip, all of your fingers are in the ball. This helps alleviate pressure, distribute weight and work on control.

A downside to this hold is that you have a lot more fingers in the ball and, therefore, a lot more variables to control during your release.

No Holes

No hole bowling is where none of your fingers rest in the ball. Instead, the bowling ball is cradled in the palm of your hand.

While there is some debate on the legal use of this hold in leagues, it should be considered acceptable, as long as your palm covers the ‘thumb hole’ area.

Why Are There So Many Different Types of Hole Drills?

So now that we’ve given you a rundown on how many hole drills there are for bowling balls, you are probably wondering why there is such a variation in hole amounts.

While the 3-hole drill is the most common grip switching up the number of holes changes up your grip as well.

Some people use a higher number of holes to add support to their grip, and some to change up how they throw their ball. Each hole configuration has its own positives that help its bowler in different ways. In the next section, we will discuss the different grips to hold your bowling ball correctly.

Different Grips

Besides using the number of holes drilled into your ball to change your grip and style, there is another way you can change how you grip the ball. Different grips change how the ball reacts and the style of how you bowl.

Conventional Bowling Grip

This is perhaps the most common grip used by bowlers and the most recognizable. Used the most often by beginner and intermediate bowlers, this grip is used with the 3-hole ball drill and is one of the easier grips to learn.

To set yourself up for the conventional grip, the conventionally drilled bowling ball allow you to insert your thumb into the single bottom hole of the ball.

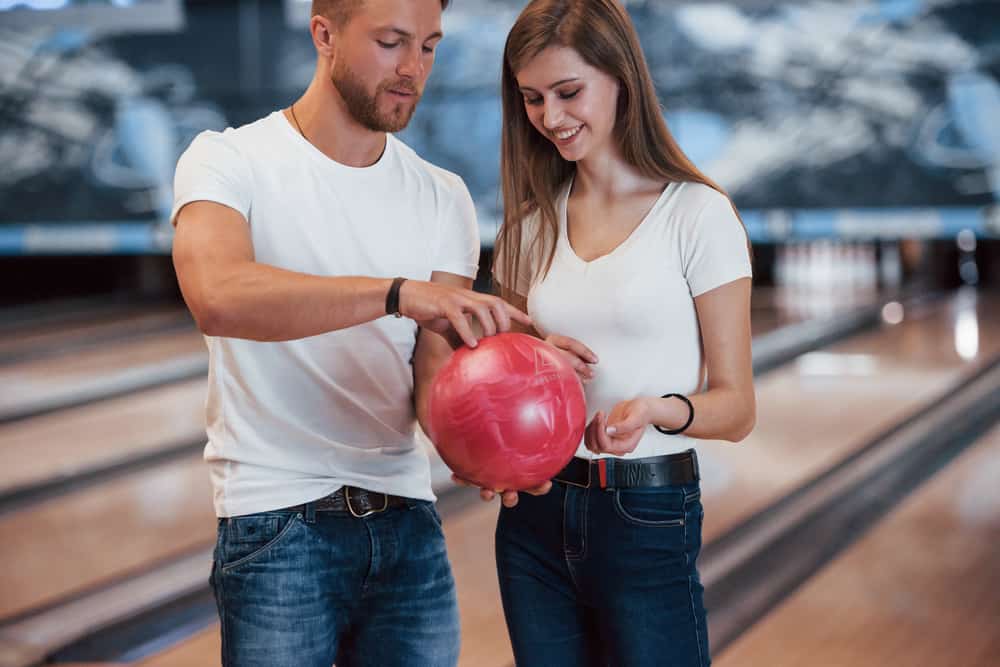
Laying your hand flat against the ball’s surface, you want to insert your middle and ring fingers into the two side-by-side holes above your thumb hole. They should slide in comfortably to the second knuckle joint.

Your pointer and pinky finger will remain flat against the ball’s surface with minimal to no strain when you try to lift up the ball using this grip.

The conventional grip is for bowlers that want to have a secure and stable grip. This grip offers a substantial amount of control over the ball and will help prevent a hook should you need a straighter, more precise roll.

This grip is also considered to be the best to use should you be working with house balls or a ball that hasn't been tailored for your individual hand.

A downside of this particular grip is that its rev rate (how many times the ball turns on its axis) tends to be lower than what it would be with other grips. Hooking can also be difficult since the conventional grip doesn’t support a spin very well.

Fingertip Grip

Now say that you’ve been practicing your bowling, your scores are becoming pretty consistent, and you’ve mastered the conventional grip fairly well.

At this point, you may be ready for the next level of grip, the fingertip grip. As indicated, this grip is for more advanced bowlers who are ready to start upping their scores and are ready to take their bowling to the next level.

The fingertip grip is what many more experienced bowlers use to generate hook and up their averages and scores.

This grip allows the bowler to increase the revs of the ball and the hook generated allows the ball to find the “pocket," the space behind the headpin, and pins two and three. By generating this hook and getting to the pocket, there is more pin impact and thus higher averages.

To execute the fingertip grip, many bowlers choose to use a 3 hole drill as well, with the difference being how you place your fingers.

The thumb should be fully inserted into the lower hole, but instead of inserting your middle and ring finger to the second knuckle, you should only allow them to go into the ball up to the first knuckle.

While this type of grip is harder to hold onto and can cause strain in the fingers, once adjusted, you’ll find that throwing a hook becomes more natural and easier to execute.

If you struggle with only keeping the first knuckle inside the ball, you can have a fingertip grip drilled ball made for you to help you learn and use this type of grip.

Semi-Fingertip Grip

This grip is only for the bowlers who have mastered both the conventional and the fingertip grip.

While this style of grip is considered more comfortable than the fingertip grip, it lacks the control the conventional grips offer, so in order to use it properly, you really need to know how to control your ball and manage your grip.

The semi-finger grip works similarly to the fingertip grip. Your thumb should be fully inserted into its designated hole, but your middle and ring finger should be inserted to the point between your first and second knuckle.

This allows you a more comfortable grip that offers a bit more control than the fingertip grip but still allows for a hook to occur, unlike the conventional grip.

This grip is not commonly recommended for bowlers since the conventional and fingertip offer both of its positives, but it can be used to help tame ball action or overcome physical challenges.

Sarge Easter Grip

The sarge easter grip is perhaps the most uncommon grip used in leagues and tournaments. This grip works to combine the conventional and fingertip grip into one layout, with fingertip grip style holes being laid out for the thumb and index finger and the ring finger hole being drilled in conventional style.

This layout is done to help improve the forward roll of the ball and reduce stress on the ring finger. By using this grip, many bowlers see a reduced rotation of the ball that helps give it a more forward roll.

They also find it to be a more comfortable grip than the fingertip grip and find they have a lot more control using this style.

Another reason bowlers will switch to the sarge easter grip is due to the fact that it reduces tension on the fingers, especially the ring finger.

Some switch because they have no choice due to injury of the fingers, some use it to alleviate arthritis pain, and some use it to just simply reduce the strain their fingers are feeling.

This grip does require a large experimental and adjustment period. Before deciding to purchase a bowling ball with this grip, see if anyone in your league has a sarge easter drilled ball, you could borrow and practice with.

If not, check with your local bowling center, or find a ‘dead’ ball of someone’s and re-drill it with a sage easter grip. That way, you can see if this grip could work for you without busting the bank on a brand new ball!

Related Articles

  • What Are Bowling Lanes Made of and Why?
  • Is It Safe to Put Shoes in Washing Machine?
  • 2 Handed Bowling

So as you can see, how you hold and grip your ball plays a huge role in how your game goes. Your grip directly affects the direction of your ball, the hook of your ball, its rev rate, your release, and your ball’s speed.

Knowing what type of grip you use and what you can expect out of that grip can also help elevate your game. For example, if it is the first throw of your turn, you’ll probably want to use a fingertip grip and work on getting that hook to the pocket.

If you should miss and land with a shot that requires precision, then switching your grip style from fingertip to conventional can help you out.

Modifying your grip style and trying new things can bring you to new levels of the game. Don’t be afraid to try new grip styles or work to switch back and forth between them.

Master all of these grip styles, and you’ll be a bowler who is confident, comfortable with control of their ball, and consistent deliveries.

Home » Blog » Page 7

Bowling Ball Sizes and Weights (How to Choose Bowling Ball Size)

April 20, 2019 by Kira Byrd

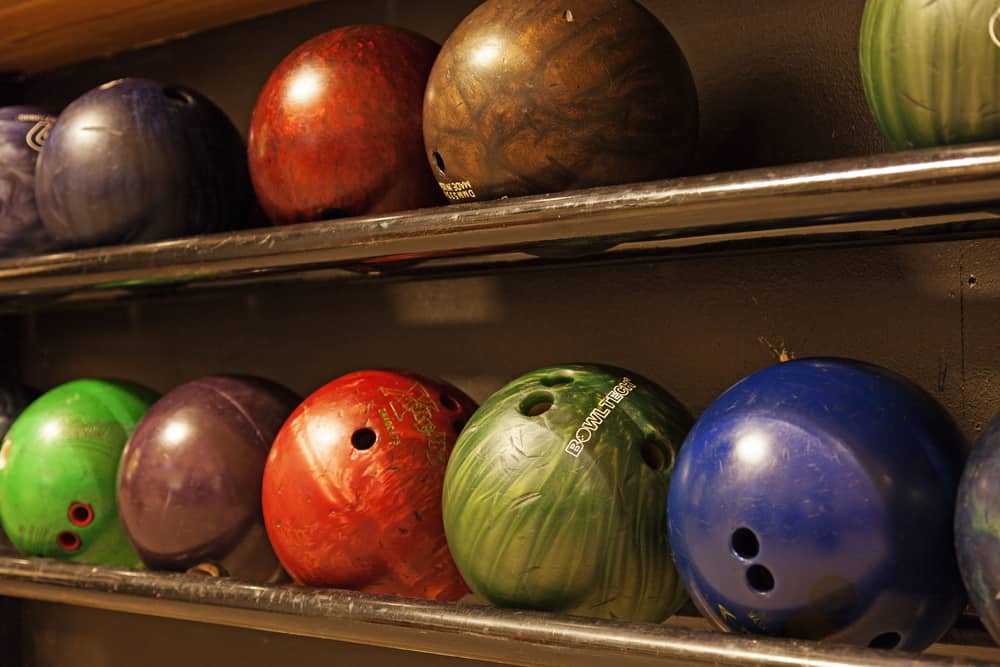
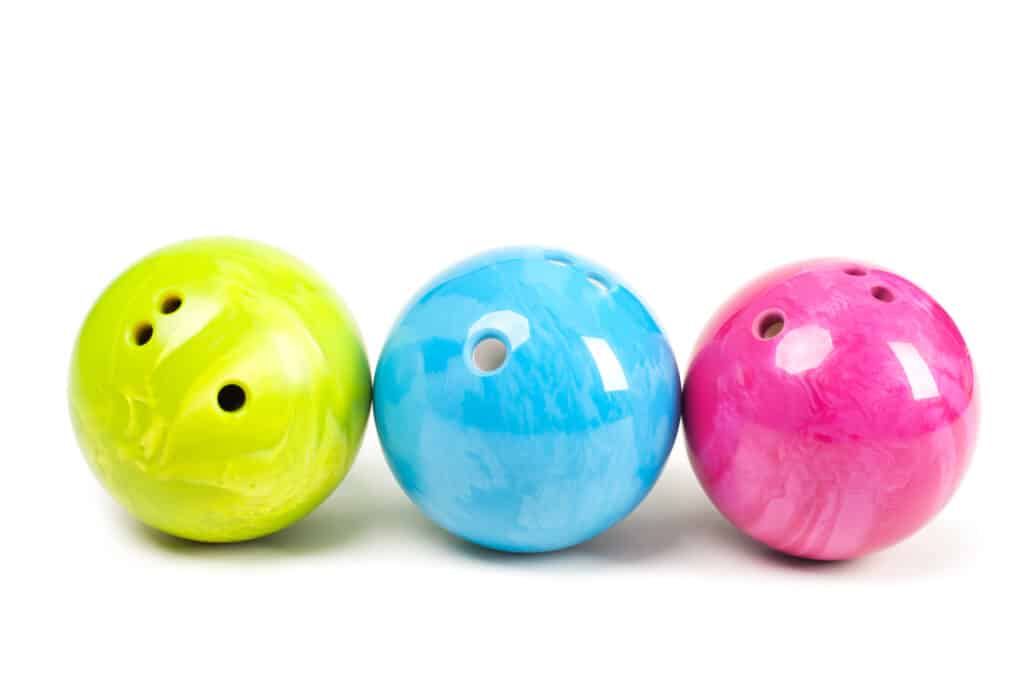
Three colorful ten-pin bowling balls; similar to the same ball colors that i found at my local bowling alley.

Let us pose a quick scenario to you: you’ve just joined a hockey team, it’s the first practice, and as a beginner, you need ice skates in order to start.

A teammate tells you they have an extra pair and hands you a pair of skates that are three sizes too small.

Confused, you look around and see everyone forcing their feet into the same-sized skate, regardless of their different needs and sizes.

When you bring this weird issue to your teammate’s attention, they merely shrug and say, “One size fits all.”

It doesn’t sound quite right, does it? Unfortunately, this is a common misconception that many beginner bowlers unknowingly fall into as they choose their bowling ball size and weight.

Many bowlers believe that one size of bowling ball does fit all and that this universal sizing is the heaviest ball you can possibly throw.

Now, we don’t know about you, but we certainly cringe at the thought of shoving our feet into skates that are three sizes too small and playing hockey in them.

So why should you force yourself to use a wrong-sized bowling ball to bowl?

The bowling ball is perhaps the most important piece of equipment you need to play bowling successfully, and having the right fit for sizing will do your game wonders.

As we mentioned before, there seems to be this false belief that you should be throwing with the heaviest ball, no matter what.

While throwing with a heavyweight can indeed be a goal, you need to make sure that you are using a weight that is comfortable for your body and working your way up to heavier weights, not just starting with them right off the bat.

Contents

  • 1 What Is the Heaviest Legal Bowling Ball Size for League Bowling?
  • 2 Why Does Bowling Ball Size Weight Matter?
  • 3 When Do You Know You Need to Change Your Bowling Ball Weight?
  • 4 How Heavy Should Your Bowling Ball Be? How to Know Your Ball Is Too Heavy.
    • 4.1 Benefits and Drawbacks of Heavy Bowling Balls
  • 5 How to Know Your Ball Is Too Light
    • 5.1 Benefits and Drawbacks of Lightweight Bowling Balls
  • 6 Is There a Difference Between House Balls and Personally Drilled Balls?
  • 7 What Is Your Ideal Weight?
  • 8 Other Bowling Balls and Their Weight
  • 9 How do You Find Your Ideal Weight?
    • 9.1 What Do Bowling Ball Sizes Mean?
    • 9.2 How Do I Know What Weight Bowling Ball I Need?
    • 9.3 Is It Better to Bowl With a Heavier Ball
    • 9.4 How Do You Know If Your Ball Is Too Heavy?
    • 9.5 How Do I Choose a Bowling Ball at the Alley?
    • 9.6 Related Articles

What Is the Heaviest Legal Bowling Ball Size for League Bowling?

The heaviest legal ball you can use in bowling is a sixteen-pound ball, per USBC specifications and while some individuals may start off with this ball (which is great), others need to start with a ball that suits their body’s needs and work their way up to a heavier weight.

The more popular weights for adult bowlers tend to range between 10 to 15 pounds, with male averages coming in at 14 to 16 pounds and females averaging around 10 to 14 pounds.

Why Does Bowling Ball Size Weight Matter?

Having the right weight will allow you to throw consistent speeds that provide more pin action.

For example, if your ball is too heavy, you will slowly but surely lose speed as practice progresses, and your body is weighed down by the ball.

If your ball is too light, you will lose possible points from the lack of force you could be having with a heavier ball.

Having a heavier ball is always the goal since the impact of the ball is dependent on speed times mass. You also want the weight that works best for you because of that speed factor.

If you can only throw high speeds at the beginning of practice with a heavier ball and then lose speed, you are better off switching to a lower weighted ball where you can keep your speeds consistent.

So if you can only throw a 16-pound ball at 10 mph as you practice (16x10=160), you would be better off with a 14-pound ball at 18 mph (14x18=252) for greater impact.

When Do You Know You Need to Change Your Bowling Ball Weight?

Knowing when you need to change your bowling ball weight is key to elevating your game and gaining consistent, predictable bowling.

Using a ball that is too heavy for you, you run the risk of injury or loss of stamina.

Use a ball that is too light, and you decrease your pin impact and potential scores.

Having a balance and knowing what to look for in either scenario will help you know when it is time to drop down a few pounds or go up a pound.

How Heavy Should Your Bowling Ball Be? How to Know Your Ball Is Too Heavy.

The biggest indicator that you are using a bowling ball that is too heavy for you is your own body.

Are you going home and waking up with sore muscles after bowling practice?

Do your joints creak in protest or seem stiff and achy? Do you have back pain, shoulder pain, elbow pain, arm pain, or wrist pain that flares up, especially after a night of bowling?

Do you notice that the speed of your bowling ball drastically drops as you play more games, and your arm doesn’t have enough stamina to maintain consistent strong throws?

If you answered yes to any of these questions, then chances are you are bowling with a ball that is too heavy for you.

Bowling with a heavy bowling ball can be great for your game, and working towards heavier weights is definitely a goal you want to strive for.

However, if you are injuring your body by using a heavy ball that you are not ready for, you are actually hurting your chances of getting to a point where you can use that ball comfortably.

The constant strain your muscles and joints undertake as they try to withstand a weight that they haven’t properly been prepared for can cause serious injury.

Even with preventive measures, such as stretches and braces, you can still tear, pull or sprain your joints and muscles.

You would not begin strength training by attempting to deadlift one hundred bounds; bowling should be no different.

Listen to your body and work your way up the weights, keeping yourself at a comfortable level that doesn’t leave you sore and aching.

Benefits and Drawbacks of Heavy Bowling Balls

BenefitsDrawbacks
A bowler has less control with heavy balls than with light bowling ballsThey tend to be more expensive than lightweight balls.
They're less forgiving if you don't hit the pins dead-on.Heavyweight balls are more difficult to throw and can cause arm strain.
It is easier to create a larger hook with a heavier bowling ball.You’re likely to get tired of bowling with heavy balls.
Have less deflection as it goes through the pins.A bowler has less control with heavy balls than with light bowling balls
Table Showing Benefits and Drawbacks of Heavy Bowling Balls

How to Know Your Ball Is Too Light

If throwing your bowling ball feels consistently easy, then it might be time to move up a weight level.

Your goal should always be to (safely) move up in weight in bowling balls due to the force increase it provides you.

If your ball is feeling easily thrown or you find yourself maybe catching a lot of air as you throw it, then you have good indicators that you should try the next weight level up.

Try using a house ball with the next weight size up for a few practices and see how it changes your game.

If you are throwing well with minimal soreness, you should be good at looking for your own ball of that weight.

Benefits and Drawbacks of Lightweight Bowling Balls

BenefitsDrawbacks
Are made from softer materials like rubber making them light for both kids and adults.Are made from softer materials like rubber, making them light for both kids and adults.
Less expensive compared to heavyweight balls.It’s challenging to achieve the perfect ball deflection.
They’re not as durable as heavier balls and may need to be replaced more frequentlyRequires more speed and momentum to achieve the same results as a heavier ball.
They're more likely to hook or split if you don't hit the pins perfectly
Table Showing Benefits and Drawbacks of Lightweight Bowling Balls

Is There a Difference Between House Balls and Personally Drilled Balls?

Ask any expert bowler, and they will tell you that using a house ball versus a ball drilled especially for you makes a huge difference.

When you use a ball tailored to fit your needs, it helps distribute the weight better, gives you a more solid grip, and helps you control the action of the ball better.

Many bowlers have claimed that they can use bowling balls up to two pounds heavier when comparing their custom-made grip bowling balls to house balls.

House bowling balls are drilled to fit varying finger sizes and grip types and are, therefore, more general in the support and grip they can offer you.

While house balls are great with preliminary tests to find the right weight for you, if you intend to take bowling seriously, then you should look into getting a custom-made ball.

The difference your personal grip will make for your weight limit will help your score a great deal.

What Is Your Ideal Weight?

So, what exactly is your ideal weight? We’ve talked about how to know if you are using a ball that is too heavy and if you are using a ball that is too light, but when do you know that you have found a ball that is just right?

The goal of any serious bowler is to find a ball weight that can be your go-to ball, one that gives you a great amount of reaction, control, and predictability as you use it throughout the night.

Most importantly, the ball needs to be at a weight that doesn’t physically wear you down as you progress with games.

As we mentioned before, heavy bowling balls decrease your stamina throughout the night and tire out your muscles quicker, resulting in a loss of speed, control, and aim.

You also want to avoid a light ball as well so you can score a higher number of points per game, resulting in the need for a middle-ground ball.

The ideal weight for your ball should provide enough weight that you are able to generate a good amount of force with it while preserving your speed and stamina as you bowl through the night.

You want a ball that keeps you at a level of comfort and doesn’t strain your muscles and joints as you use it for an extended period of time, whether it is one night of practice or throughout a whole season.

House bowling balls are a great way to narrow down your zone of comfort without spending too much money.

Just remember that there is a notable difference between house ball weights and personalized ball weights.

Other Bowling Balls and Their Weight

Bowling balls vary depending on the type of game you’re playing. 

Ten Pin Bowling- is widely known, and it’s what you think about when someone mentions bowling.

Ten Pin balls are typically performance or non-performance balls with 3 finger holes.

According to the USBS specifications, the ball can be as light as a feather and up to 16 lbs. 

Duck Pin Bowling- is slightly different in pin shape/size and ball than the Ten Pin bowling specifications.

Duck Pin bowling balls weigh between 3lbs 6oz and 3lbs 12oz, and it’s fingerless, with no holes. 

Candle Pin Bowling- is similar to Duck Pin Bowling.

The Candlepin bowling balls are smaller balls, have no holes, and have a max weight of 2lbs 7oz.

How do You Find Your Ideal Weight?

So now that you know how to recognize the different ways your body can respond to weight types, how do you go about finding your ideal weight?

Well, you could take the long road and search for it through experimentation, trying each ball type for several days and working through the ranks in a long, drawn-out process.

Or, you could just use a method that helps you locate the proper weight for your bowling ball and work up from there, stopping at your body’s comfort level.

If you really want to go with the trial-and-error method, go right ahead; it could be a lot of fun!

However, just to be safe, you may want to read the method most bowlers use to find their starting weight.

The process of finding the right starting weight for you in bowling really comes down to a simple math equation.

You take your body weight in pounds and divide it by eleven, rounding to the nearest whole number. That’s it!

Once you have your starting number, it is usually a good idea to even start a few pounds lighter than that number and work your way up to heavier weights based on your body.

For example, say that you weigh one hundred and fifty pounds.

In order to find your starting weight, you take 150 and divide it by 11, getting an answer of 13.63.

Since we are rounding to the nearest whole number, the starting weight of your ball would be fourteen, but you should start with a 13 or 12 and work your way up to a 14 over the course of practice to make sure it is the right fit for you.

So now that we’ve discussed why the right weight in your bowling ball is important, how to recognize that you need to change your bowling ball weight, and how to find the ideal weight for you to use when bowling, we hope you take these skills out into the bowling world and put them in to practice.

Be patient as you experiment with different weights.

This is an ever-learning, evolving process. As you get stronger, your bowling weight may change and grow heavier, or you might reach an equilibrium of weight.

Both options are good as long as you remember that consistent speed is the key.

What Do Bowling Ball Sizes Mean?

Bowling ball sizes refer to the weight of the ball, not its dimensions, which are universal. The weight can vary, starting as light as 6 lbs and reaching a maximum of 16 lbs. Choosing the right weight is crucial for a bowler's performance and comfort. Many adult bowlers often prefer weights around 14 to 15 lbs. The correct weight helps maintain control, accuracy, and consistency in the game.

How Do I Know What Weight Bowling Ball I Need?

Do you need an expensive ball if youre a beginner

Generally, the 10% rule is used. The 10 percent rule of thumb states a bowler should bowl with a bowling ball that's 10% of their body's weight. For instance, if you are 120 lbs, you should bowl with a 12-pound ball. If you are 140 lbs, you should bowl with a 14-pound ball.

Is It Better to Bowl With a Heavier Ball

Using a heavier ball has its pros and cons. While it can lead to better pin action and less deflection, it's not always the best choice for everyone. A ball that's too heavy can be difficult to control and might lead to strain or injury. Bowlers must select a weight that complements their physical strength and skill level, ensuring safety and optimal performance. The goal is to find that sweet spot where the ball's weight enhances your game without causing discomfort or strain.

How Do You Know If Your Ball Is Too Heavy?

Does bowling ball weight matter

Immediate discomfort and/or pain and poor form.

The weight of the ball should be evenly distributed in your hand. If the ball feels top-heavy or off-balance, it is likely too heavy for you. Your arm should be comfortably extended when you bowl. If you have to reach or strain to throw the ball, it is probably too heavy. 

Watch your form. If you find yourself clutching the ball tightly or tensing up when you swing, the weight of the ball may be too much for you. Lastly, listen to your body. If your back, arm, or shoulder starts to hurt after bowling a few games, the ball is likely too heavy. 

How Do I Choose a Bowling Ball at the Alley?

Depositphotos 3641028 s

By the fitting of the finger holes and weight. Choosing a bowling ball from the alley is convenient for new bowlers who haven't purchased a customized ball. Unlike customized balls, house balls are not drilled for your specific hand span and finger sizes.

So when choosing a bowling ball at the alley, it's important to choose a ball that allows your fingers to comfortably enter and pull out of the holes effortlessly and maintain a secure grip. In addition, the bowling ball should be the ideal comfortable weight (not too heavy and not too light).

Related Articles

  • What Fingers Do You Use to Bowl
  • Bowling Lane Oil Patterns
  • How to Throw a Bowling Ball Faster
  • Best Bowling Shoes for Sliding

Having a strong, consistent speed will help you generate more force at the point of pin impact, gaining you better results in your scoring.

It is also important to remember throughout this process that you need to listen to your body. Overextending your limits as you work to find your bowling ball weight can lead to strains, tears, sprains, and other related injuries.

Don’t be afraid to take it easy and enjoy the process of finding your ideal bowling ball weight. Consider it an adventure in your journey to becoming a better bowler!

Home » Blog » Page 7

Best Exercises for Bowlers (Improve Your Game with this Article)

February 23, 2019 by Kira Byrd

Weight training and strength training are great options to build both upper body strength as well as muscle mass.

When you make the decision to join any sport you’ll find that in no time at all certain muscles, joints and ligaments in your body become sore. Bowling, which is a sport, is no exception to this rule.

When you bowl you use a wide variety of muscles, joints, and ligaments as you move through your bowling stance to deliver a weighted ball down a sixty-foot lane.

Bowling also requires a lot of muscle endurance and coordination, causing even the most seasoned pros to grow sore after repeated tournaments.

However, just like with any other sport, there are exercises and workouts you can do to strengthen your body, get it in the shape needed to bowl successfully and keep it in that shape. In this article, we'll discuss the best exercises for bowlers, including warm-ups, stretches, shoulder sets, cardio, and finger exercises.

Contents

  • 1 The Best Exercises for Bowlers
  • 2 Stretches: Warm-up Exercises for Bowlers
    • 2.1 Overhead Stretches
    • 2.2 Cross Stretches
    • 2.3 Lunges
    • 2.4 Wrist Flexion/Extension
  • 3 Full Body
  • 4 Cardio
  • 5 Strengthing
  • 6 Sit-ups
  • 7 Squats
  • 8 Pushup
  • 9 Grip
  • 10 Wrist
    • 10.1 Farmer’s Walk
  • 11 Softball
  • 12 Fingers
  • 13 Squeezing
  • 14 Thumb Opposition

The Best Exercises for Bowlers

The best bowling tips include a conditioning program with strength exercises.

Stretches: Warm-up Exercises for Bowlers

Before you begin any exercise it is important that you stretch your muscles and tendons out first. Taking a small amount of time to warm up your body will help prevent injury during exercise and prevent lactic acid buildup in your muscles.

(Lactic acid is one of the key causes of sore muscles.) It is also important that you target different areas of the body, you never know what muscles you could end up using and it will also improve your flexibility!

Overhead Stretches

This stretch is a great way to stretch out your shoulder and upper arm muscles, key muscles used in bowling. It’s a low impact stretch with low risk of injury as long as you listen to your body and proper form is maintained.

  1. Lift one arm up over your head.
  2. Bend down the elbow until your fingers are tickling the back of your neck.
  3. Grasp your elbow with your free hand and pull it slightly behind your head until you feel a good stretch, there should be no pain.
  4. Hold this position for 10-20 seconds
  5. For an extra stretch, you can tilt sideways at the waist in the direction you are pulling, you should feel a small stretch down the side of your abdomen.
  6. Alternate to your other arm and repeat the process.
  7. Repeat 2-3 times per arm.

Cross Stretches

This stretch is also a good way to prepare your shoulder and arm for a fun day of bowling. By completing this stretch before bowling you help prevent injury. You can also complete it throughout the week to improve flexibility over time.

  1. Pull your arm across your chest, keeping it straight and somewhat loose.
  2. Use your free arm to grab the extended arm at the elbow and lightly pull until you feel a stretch in your shoulder.
  3. Hold the position for 10-20 seconds before switching arms.
  4. Repeat 3 times for each arm.

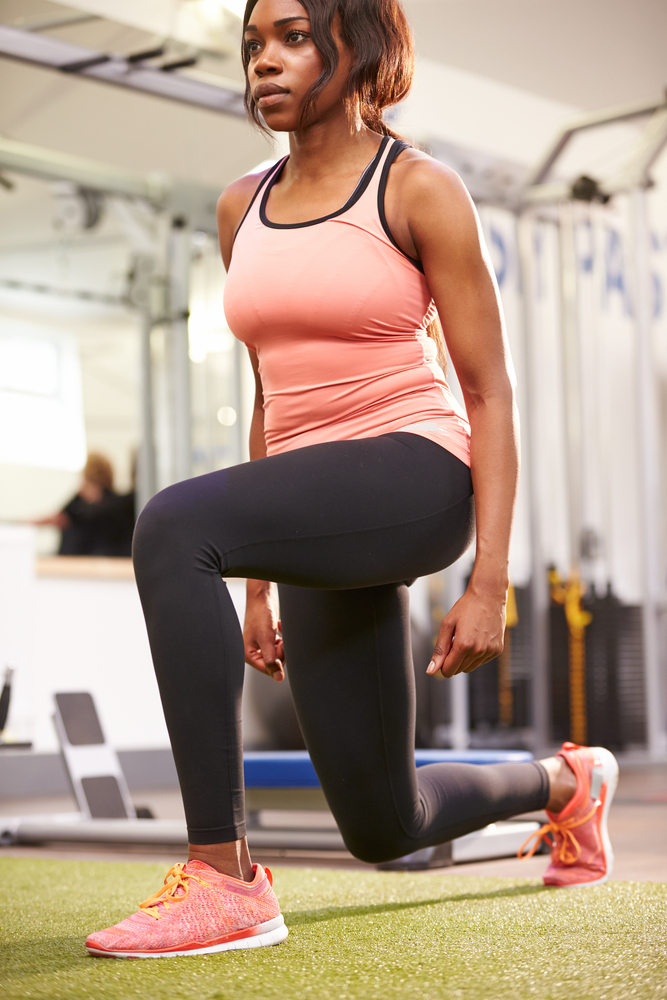
Lunges

An exercise routine that includes weights, coupled with strength training and a personal trainer creates a weight training program for results.
Woman doing lunges in a gym, vertical

This is a fantastic stretch that can double as a strengthening tool. The lunge helps work out your legs and abdominal muscles, as well as strengthens your knee joints and improves flexibility. (In case you haven’t noticed flexibility is a big deal in bowling.)

  1. Place your hands on your hips and stand with your feet shoulder length apart.
  2. Move one foot forward about 2 to 3 feet (you want a good stretch but also don’t want to sacrifice your balance) while keeping the other foot planted.
  3. Lower your planted leg into an ‘L” shape, with only your toes touching the ground. Your extended leg should naturally shift into an upside down ‘L’ shape to accommodate the change in position. Make sure to keep your back straight and your hands on your hips the whole time!
  4. Hold the position for 10-20 seconds before returning to your upright stance, legs back together. Alternate to the other leg and repeat the process 10 times for each leg.

Wrist Flexion/Extension

This is another great stretch for bowlers to implement! This stretch works on your forearm, wrist, and fingers, key areas used in bowling. It also helps improve flexibility in these areas as well, extremely important for bowlers since these are heavily used areas.

1. Extend your arm and flip it so the inside of your elbow is facing up.
2. With your free grasp your fingers and gently pull your fingers down until you feel a stretch in your forearm.
3. Hold for 10-15 seconds before releasing your fingers and repeating the process with the other arm. Repeat 3 times for each arm.

Full Body

When people think of the muscles used in bowling they tend to focus on key areas such as the arms, shoulders, and legs. They may also focus on joints like the knees, wrists, and elbows. While these groups of body parts are indeed important to the sport of bowling it is also important to not just focus solely on these areas.

As a bowler you should also put effort into strengthening your whole body, the benefits will make all that effort worthwhile!

Cardio

Believe it or not cardio can actually greatly help improve your bowling abilities. Though bowling is considered a low-impact sport it does require a lot of physical exertion.

Having endurance, strength and flexibility will help keep you on top of your game as you progress in bowling and keep your mind active and sharp.

The best cardio exercises for a bowler to take part are generally other low-impact sports that run a low risk of injury. Swimming, cycling, rowing, and walking are good sports to take part in to increase cardio.

Cycling and walking are especially good for bowlers since they work out the lungs and increase endurance but are mainly focused on the legs so your arms are well rested for throwing bowling balls.

Strengthing

While cardio certainly benefits bowlers one of the most important activities a bowler can do is strengthening exercises. Strengthening plays a huge role in preparing your body to be ready to grip your ball, throw your ball with the correct aim and move through your stance flawlessly.

Sit-ups

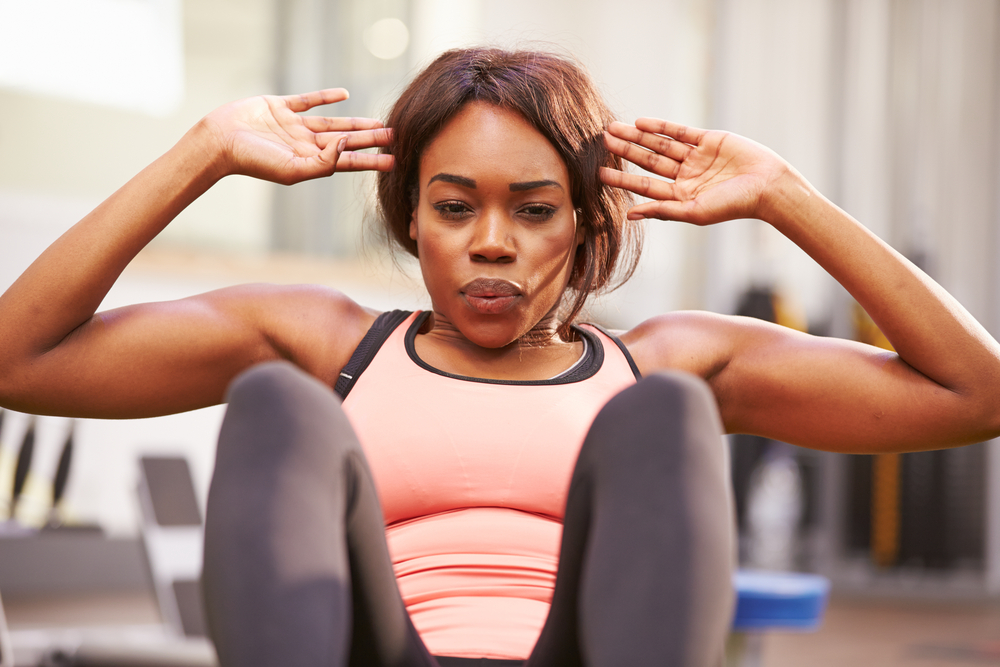
Working out during the sport season is given; however, basic strength training during the off season is just as important. Building a strong core with sit ups helps to improve balance and your overall fitness level.

You may remember this type of exercise from your gym classes at school. Well, there is a reason your gym teacher thought to teach you this technique, it works!

Sit-ups are a great way to work out those hard to reach abdominal muscles, strengthening your core. A strong core is a strong foundation for the rest of your body!

  1. Lay with your back to the floor and bend your knees while making sure your feet are flat on the ground. You may need to find a strong piece of furniture or a friend to hold your feet.
  2. Either place your hands on the side of your head or cross your arms across your chest.
  3. Lift your head and shoulders off the ground, curling up your stomach until you can touch your chest to your knees.
  4. Uncurl and lay all the way back down to the ground before repeating the process.
  5. For beginners complete reps of 20 three times a week and increase the reps as your endurance goes up.

Squats

If you want to call yourself a bowler you must be able to perform a squat. This strengthening exercise plays a very important role in strengthening your quads (upper leg muscles) and by default strengthening your knees.

Your knees are crucial to bowling and can be injured if not treated right as you play the sport. By strengthening them you are helping protect them.

  1. Stand with your arms extended fully out from your chest, feet shoulder length apart.
  2. Keeping your arms extended and your back straight you want to bend your knees until your thighs are parallel to the floor, it should look as if you are sitting in an invisible chair.
  3. Return to the standing position and repeat, doing 10 reps twice a day for 3 days a week. You can increase the number and frequency of the reps as you feel your strength and endurance improve.

Pushup

This is another gym class classic! This exercise is great for strengthening your arms, elbow joints, shoulders, and abdominal muscles, all of these muscle/joint groups being used in bowling!

  1. Start by placing your hands and knees on the floor, making sure you are wearing shoes with good traction or going barefoot. (Socks will make you slide and lose your balance.)
  2. Extend and lock your elbows as you straighten your body. Only your hands and feet should be touching the ground. Your body should also be straight and stiff as if you were a wooden board.
  3. Bend your elbows to lower your body towards the ground, stopping about 2 inches away so your hands and toes remain the only parts of you to touch the ground.
  4. Raise yourself back up so your elbows are fully extended, keeping your body straight and stiff. (No butt raises!)
  5. Repeat 10-15 times, doing 2 reps a day 3 days a week for starters.

Grip

While it is very important to work out your limbs and muscles as a bowler it is also important that you should work to improve your grip.

Your wrist and fingers play huge roles in your ability to bowl, your wrist turning the ball just right to complete your throw and your fingers clinging and maneuvering a ball many times their weight.

While it can be easy to forget about these two there are thankfully severally exercises that can be done to get them ready for bowling.

Wrist

The wrist is one of the most common areas of injury in bowling. It goes under a lot of strain as it twists a ball into position and hurls it down the lane.

Braces and supports help protect this vital joint but by completing set exercises you can also improve your grip, strengthen your wrist, and lessen the chance of injury.

Farmer’s Walk

While simple to execute this exercise shows great results in strengthening the wrist, improving flexibility and improving grip.

  1. Pick up a heavy dumbbell or a bucket of sand should one not be readily available. You want a good solid weight that doesn’t hurt to hold, but definitely makes you work to hang on!
  2. Walk as far as you can with it.
  3. Gently drop it when you can no longer hold it.
  4. That’s it! Easy to do but with great results!

Softball

This exercise focuses on strengthening the flexion and extension of your wrist, improving muscles for bowling and increasing your grip strength.

  1. Take a small weighted ball (can of vegetables will work if you can’t find a ball) and cradle it in your hand face up.
  2. Curl your wrist and the ball towards your forearm, you’ll want to feel a gentle stretch with each rep.
  3. After you’ve done ten with each arm flip your arm around so the ball is face down.
  4. Curl your wrist and the ball towards your forearm once again, you should still feel a stretch but it should be centered in a different area of your wrist.
  5. Do 10 reps for each side, repeating the reps two times a day for 3 days a week.

Fingers

Fingers may be a little tricky to work with, you may not always feel like you are giving them a workout or stretching them properly. Even if you don’t feel improvement or soreness right way it is important that you continue these exercises because believe us, they work!

Squeezing

Depositphotos 521122884 s

One of the most simple ways you can improve your finger grip strength is to grip things with your fingers! (Shocking, we know) This exercise is so easy in its simplicity.

All you need to do is squeeze a stress ball, tennis ball or a pinch grip at random intervals during the day and you are on your way to stronger fingers. This method can be done while working, watching TV or whenever you have a hand free. It is so easy to do, so why not try it?

Thumb Opposition

Unlike squeezing, this method of strengthening your fingers does not require anything extra. All you need is your five fingers!

  1. Hold your hand upright so your fingers are pointing upward.
  2. Take your thumb and apply it firmly to the tip or your pinkie finger.
  3. Apply pressure for 5 seconds, not enough to cause pain but just enough to feel opposition.
  4. Move on and repeat with the rest of the fingers, focusing on the tips of each one.
  5. Perform three rounds of this on each hand a day for the best results.

So as you can see, it is incredibly easy to help your body get ready for bowling and keep it in shape. There is very minimal equipment required to work on the muscle groups and joints that bowling uses and all you need are a few minutes a day to complete reps.

Stuck in a traffic jam on your way home? Work on strengthening your fingers. Waiting for the copier at work? Do a couple squats and ignore your coworker’s odd stares, they’ll soon be jealous of your thigh muscles anyway.

The point is, with how easy it is to complete smalls reps of strengthening and stretching, why wouldn’t you take the time to do so?

By working on these exercises your helping protect your body from injury, improving the power and dexterity in your throws, increasing flexibility and getting in better shape. So why not give them a try and see the results for yourself!

Home » Blog » Page 7

Tips for Bowling on Dry Lanes (Plus, the Best Bowling Ball for Dry Lanes)

October 23, 2018 by Kira Byrd

The best bowling ball to use on medium to dry lanes is plastic spare ball that doesn't react to negatively to lane conditions.

As you progress into the fascinating and intricate world of bowling (seriously, this game is a lot more complicated than people like to think), you will hear more and more phrases or terms that are new to you.

Being a novice to the terminology is perfectly fine since learning the phrases will improve your understanding of the game of bowling better and gives you an edge in your game. However, it is essential to make sure that you take time to learn its meaning when you learn a new phrase.

A couple of new terms that you may have heard throughout the bowling alley as you have bowled could have been the terms 'wet' or 'dry' lanes. Typically when we think of the terms wet and dry, we usually think of water in some shape or form.

If you're in a hurry, the best bowling ball for dry lanes is the Pyramid Pathogen Plague for dry lanes. With its 1000 Abralon grit and urethane coverstock, the arc is controlled on dry lane conditions.

That is not the case with our bowling alleys. Instead, the terms wet and dry refer to the saturation of oil on the lanes, a factor that could be affecting your bowling game!

Contents

  • 1 What are Wet and Dry Lanes?
    • 1.1 Wet Lanes:
    • 1.2 Dry Lanes:
  • 2 Is a Urethane Bowling Ball Good For Dry Lanes?
  • 3 What's the Best Bowling Ball for Dry Lanes?
    • 3.1 "Pathogen X" by Pyramid
    • 3.2 "Path Rising" by Pyramid
    • 3.3 "Rhino" by Brunswick
  • 4 How Do You Make Angle Adjustments on Dry Lanes?
  • 5 How Do You Reduce Your Bowling Hook on Dry Lanes?
    • 5.1 Changing Your Release
    • 5.2 Alignment
    • 5.3 Ball Change
    • 5.4 Change Your Ball's Speed
    • 5.5 Combine
  • 6 What Causes Bowling Lanes to Become Dry?

What are Wet and Dry Lanes?

As a new bowler, you shouldn't worry about oil patterns too much since you'll first be working on throwing your bowling ball as accurately as possible. However, as you progress into a better bowler, you will eventually want to learn how to figure out the lane conditions or 'read the lanes' as it is commonly called.

One of the best ways to do this is to figure out if the lane is dry or wet and what that exactly means to you as a bowler.

Wet Lanes:

When bowlers talk about how a lane is wet or 'oily', they refer to the fact that there is some heavy saturation of oil on the lane. Every lane has an oil pattern applied to it. This oil pattern, in turn, affects how a bowling ball will progress down the lane and how it will hook.

When there is a lot of oil on the lane, it's wet, and bowling balls slide down the lane a longer distance before hooking. Because of the sliding, the break point, the proper place for the bowling ball to turn for the hook, can be missed.

A wet lane can usually be pretty easy to figure out and play on but don't get too confident! Some wet oil patterns increase the level of a lane's difficulty because their oil saturation is so high the bowling ball has a hard time hooking at all!

To test the oil saturation, throw a few practice balls before you begin your game while aiming for the center dot.

If your bowling ball refuses to hook, there is probably a high saturation of oil down, and you can adjust to the right to combat the lane conditions.

Dry Lanes:

As you might have figured out, a dry lane is the opposite of a wet or 'oily' lane. When a lane is dry, there is less oil down, and the bowling ball tends to hook faster as it rolls down the lane. Due to this fast hooking, many bowlers find dry oil patterns complicated to navigate.

This difficulty comes from the fact that many high-level bowlers usually utilize a hook throw (the arch of the hook varying by bowler's style) to approach the pocket of the pins at a better angle. Since dry oil patterns cause hooks to happen quickly and shorten the length of the bowling ball's approach, many bowlers experience difficulty adjusting their style to this problem.

To figure out if you are dealing with a dry lane, you can again approach the center dot. After you throw your bowling ball, watch if the ball pulls to the left as it rolls down the lane. If it does, the lane is probably dry, and you need to make adjustments to combat this issue.

Is a Urethane Bowling Ball Good For Dry Lanes?

The answer is yes! Urethane bowling balls are great for dry lanes because of their unique properties. They have a tough and smooth surface that makes them less likely to absorb oil from the lane, which can cause the ball to hook too early. 

Urethane bowling balls also have a lower friction coefficient than other bowling balls. This means they will slide further on the lane before hooking, a significant advantage on dry lanes, and a disadvantage on the lanes most likely oiled, and the ball can hook too early. 

What's the Best Bowling Ball for Dry Lanes?

When selecting bowling balls for dry lanes, it is essential to know the basic criteria. A bowling ball is generally made up of two parts: the ball's coverstock or surface and the ball's core.

Weight plates and hole layouts play a part in the makeup of bowling balls, but the coverstock and core make up most of the bowling ball in its entirety.

When choosing dry lane bowling balls, it is essential to look at your selected coverstock. The core is essential because it controls the ball's motion, but the coverstock is what reacts to the dryness of the lane.

You will want a bowling ball with a shiny or plastic-looking cover with a high polish (you can polish the bowling ball to suit your needs if needed). These stiff coverstocks will help you transverse dry lanes more efficiently. Poly urethane bowling balls will probably suit your needs on dry lanes the best.

We have three recommendations of the best bowling ball for dry lanes discussed below: the Pathogen X bowling ball, Pyramid Path Bowling ball, and Brunswick Rhino bowling ball. If you are more interested in finding a specific bowling ball from a brand to suit your dry lane needs, keep reading.

"Pathogen X" by Pyramid

Pyramid pathogen x bowling ball
Pyramid Pathogen X Bowling Ball
Check Price
Bowling for Beginners may receive compensation if you make a purchase using this link, at no additional cost to you.

The first is Pathogen X from the brand Pyramid. This bowling ball is one of the brand's bestsellers and for good reason. The Pathogen is a heavy-hitting bowling ball, with an excellent core, pearl reactive coverstock, and adjustable weight.

Its strength, versatility, and kickback help it navigate through dry conditions with practiced ease, ensuring no loss in power when it makes a break for the pocket.

The Pathogen X can be on the pricy side, but this is one of those cases where you are paying for a high-quality piece of equipment. Sometimes the extra price tag can be worth it for in-game improvement.

The bowling ball can be used by beginners but is recommended for more experienced bowlers since it is geared toward expert handling and powerful hooks.

"Path Rising" by Pyramid

Pyramid path rising bowling ball
Pyramid Path Rising Bowling Ball
Price Checker
Bowling for Beginners may receive compensation if you make a purchase using this link, at no additional cost to you.

Another good bowling ball is the Pyramid Path bowling ball; it's a great entry-level ball for beginners trying to get a handle on dry lanes. Path Rising bowling ball is built for high efficiency on dry lanes with a symmetrical core for stability and a pearl coverstock but can still be used in other conditions.

"Rhino" by Brunswick

Brunswick rhino bowling ball for hooking
Brunswick Rhino Bowling Ball For Hooking
Check Price
Bowling for Beginners may receive compensation if you make a purchase using this link, at no additional cost to you.

Another good bowling ball is the Brunswick Rhino bowling ball; it's a great entry-level bowling ball for beginners trying to get a handle on dry lanes. Rhino comes in a variety of colors and weights.

It's a reactive resin ball and is great if you bowl straight and if you need to incorporate a hook. With its reactive coverstock, the Brunswick Rhino is built for high efficiency on dry to medium oiled lanes.

How Do You Make Angle Adjustments on Dry Lanes?

The key to figuring out the adjustments needed on your lane is to have base throw mastered to compare all other throws to your base throw. Many bowlers aim for the center dot during their warm-ups and make adjustments based on how their bowling ball react.

If the bowling ball does not hook very well, you may be dealing with a wet lane. You need to shift to the right and turn your shoulders to 'close' them to adjust to this. Shifting helps you adjust and deal with wet, oily lanes as you work out the lane conditions.

You probably deal with a drier lane if the bowling ball pulls to the left during your warm-up. To combat a dry lane, you must adjust yourself to the left and 'open' your shoulders.

Shifting to the left helps you navigate dry lanes better and helps your bowling ball get down the lane and hook better. The critical thing to remember while adjusting your angles is that you should make your adjustments in the same direction as the error.

If you have problems on the right side of the lane, make adjustments to the right to offset. The same can be said for the left side of the lane; make adjustments on the left side to counteract any problems you should have.

How Do You Reduce Your Bowling Hook on Dry Lanes?

Another way you can traverse dry lanes is to work on reducing your hook on dry lanes. Doing this helps you combat the early break bowling balls undergo on a dry lane which will help prevent missed pins and pickups.

There are several ways to reduce your hook on dry lanes and several things you can try to change, though we recommend trying them one at a time to see how your style changes before you try changing your throws with different combos.

Changing Your Release

The key to having a good hook throw is how the bowling balls are released. Since the release is the first step in a good hook throw, it makes sense to start there with your adjustments to get a reduced hook throw.

You want to produce less of a hook to adjust your release for a dry lane. It would be best to carry the ball through but impart a minor rotation on it with your fingers.

Start in your traditional approach, making sure your bowling ball is set up for a hooked throw. You can try two things as you approach your throw: less rotation from the fingers and a slightly titled wrist to give you fewer revs (revolutions) without losing power.

As you are preparing to release your bowling ball into its throw, tilt your wrist, which remains behind the ball, at a slight backward angle. Tilting your wrist causes a more extended skid motion as the ball moves down the lane, which works well on drier lanes that cause early breaks.

During this time, as you are tilting your wrist, you are also working on making sure your fingers only give your ball a slight rotation. You do not want a lot of finger rotation on a dry lane since this will cause your ball to hook early in the dry conditions.

Alignment

Now that you've done your warm-up throws and see how your ball reacts to the lane, it is time to make some lane alignment adjustments.

Based on how the bowling balls react, you can change the position of your feet during your approach and your target mark on the lane to help give your ball more of an angle to compensate for the dry conditions.

It is important to remember that you should make adjustments in the same direction, so if you move to the left a few boards, you should try to move your target mark to the left at an equal distance to adjust for the movement.

Ball Change

If you are looking to reduce a hook on a dry lane, sometimes the only thing you need to do is switch up your bowling ball. Bowling balls come in many different forms, styles, and sizes, and each bowling ball reacts uniquely.

If you are struggling with a hooked thrown on a dry lane, it might help to switch to a specifically designed dry lane bowling ball.

Change Your Ball's Speed

Another method you can try is adding more force to your backswing, forward motion, and release. By putting more power behind your backswing, you increase your ball's speed and thus shortening the time it spends on the lane.

By doing this, your ball has less time to hook incorrectly and can fall into the correct position when it begins its break towards the pocket. Be careful with this method, though, since increased power usually means less control.

Combine

Now it's time to determine which method is suitable for you.

Do you pick one single method to reduce your hook and work on perfecting it, or do you begin combining the methods to see if a combo works better for you?

Both are perfectly viable options for you; it all depends on your needs and style!

What Causes Bowling Lanes to Become Dry?

There are a couple of reasons that a bowling lane may become dry. One reason is simple; the lane gets used a lot. If you come late in the day, the bowling alley hasn't run a machine in a few days, or you come after a league or open bowl, the oil on a lane could be spread thin and turned dry.

Another reason would be the particular pattern the alley has chosen to lay down on the lane. Different bowling alleys can choose different oil patterns to lay down on different lanes, and some of these patterns may be drier than others.

These reasons are why it is so important to keep an open mind and test each lane with warm-up throws before you play. You never know what the condition of the lane will be, so you never know what adjustments you will need to make.

It is essential to remain flexible and make adjustments before you begin your series to ensure a better score on the lane you have been given.

While dry lanes may be a struggle for some, it is essential to remember that the challenge is part of the fun!

Through hard work, practice, and learning how to read the lane, you can be well on your way to choosing the right bowling ball and breezing through dry lane issues with relatively no problems. All it takes is an open mind and some flexibility in your style, and you will be rolling strikes on dry lanes in no time!

  • « Previous Page
  • 1
  • …
  • 5
  • 6
  • 7
Bfb about me wlogo2

Welcome!

Since 2018, Bowling for Beginners understood the importance of clear, concise, and organized content needed in the bowling space. That’s why we have carefully structured our platform to provide you with a step-by-step approach to mastering the fundamentals of bowling.

More about us

Recent Posts

  • The bowler with a purple bowling ball crosses the foul line and heads toward the dangerous pin-setting machine.
    12 Bowling Etiquette Rules, Do’s & Don’ts for Beginners
  • Best bowling shoes for beginners
    The Best Bowling Shoes for Beginners, Sliding, Toe Draggers, & Wide Feet
  • Gift vouchers or gift certificates on white wood background, wrapped in brown paper with a white bow are great gift ideas.
    Best Gifts for Bowlers: Coaches, Teams, Leagues, and Parties
  • Three bowling balls showing the conventional drill 3 finger holes for bowling
    Semi-Fingertip Grip Bowling: Mechanics, Thumb Usage, and More
  • Knowing the terminal velocity of a bowling ball is important information for a bowler.
    What Is the Terminal Velocity of a Bowling Ball? Easily Explained
  • What is Scratch Bowling; Everything You Need to Know

Popular Posts

  • Learning the types of bowling ball with the most hook.
    Bowling Balls With the Most Hook: Our Top 8 Aggressive Balls
  • The best bowling shoes available for rental at the local bowling alley require you to wear socks since they're shared.
    What Shoes Can You Wear Bowling? Can You Wear Regular Shoes?
  • Pink bowling ball on lane butcher alley wax
    How to Use Bowling Alley Wax and What Is It and How to Apply
  • These five friends are leaning against white wall reading bowling books
    12 Best Selling Bowling Books & Beginner Friendly Books
  • A green bowling ball, ten pin and bowling shoes are on bowling lane.
    Bowling Rules for Beginners: Basic Rules and Regulations
  • Yellow urethane bowling balls on synthetic lanes at the bowling center
    Why Do Bowling Alleys Oil Lanes? 6 Unknown Reasons You Need to Know

Recommended Reading

  • Bowling Oil Patterns Explained (Finally a Newbie Friendly Guide)
  • How to Hold a Bowling Ball (and Finally Increase Your Score)
  • Bowling Ball Sizes and Weights (How to Choose Bowling Ball Size)

Footer

↑ Back to Top

About

  • Privacy Policy
  • Terms & Conditions
  • About

Contact

  • Contact
  • Blog

Legal Information: The information on this site is provided for educational purposes only. We may have an affiliate relationship with certain goods that we recommend. We may receive compensation if purchases are made using our affiliate links at no extra cost to you. Bowlingforbeginners.com is a participant in the Amazon Associates Program. As an Amazon Associate, we earn from qualifying purchases.

COPYRIGHT © 2018–2022 BOWLING FOR BEGINNERS
4614 Hwy 280 #1123 Birmingham, AL 35242 | 1 (844) 424-BOWL